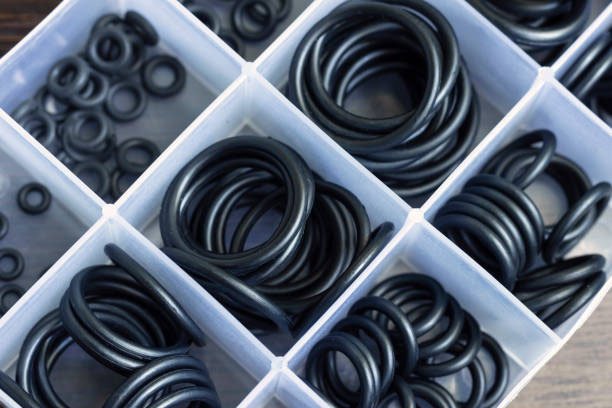
Introduction
Ever been stumped by a mysterious leak in your system, only to find an O-ring at the heart of the problem? You’re not alone. Despite their unassuming appearance, O-rings are critical to system performance — sealing everything from aerospace hydraulics to coffee machines. When they fail, operations stall, downtime escalates, and costs mount.
Understanding why O-rings fail isn’t just about troubleshooting; it’s about prevention. In this guide, we’ll explore the most frequent O-ring failure modes, explain what causes each one, and show you exactly how to stop them before they start.
Let’s dive into the seven most common failure types — and how you can confidently avoid them like a seasoned pro.
1. Compression Set — The Silent Flattening That Kills the Seal
What It Looks Like
You remove the O-ring after service and notice it’s lost its bounce. It looks squashed, flattened on both sides, and doesn’t return to its round shape. That “springy” rubber feel is gone.
Why It Happens
Compression set is one of the most deceptive failures. Over time, under continuous pressure and heat, rubber can lose its elasticity. The O-ring becomes a hardened shape inside the gland and no longer pushes back against mating surfaces. That small gap invites leaks.
Often, it’s due to:
- High operating temperatures causing material degradation.
- Poor material choice for thermal resilience.
- Excessive squeeze or gland miscalculation.
- Prolonged compression with no pressure cycling.
How to Prevent It
- Material Matters: Use O-ring compounds with low compression set ratings. Silicone, FKM (like Viton®), and some specialty NBRs are designed for low set.
- Temperature Awareness: Ensure your compound can handle the peak and sustained temperatures in your system.
- Squeeze Wisely: Review gland designs to avoid over-compression.
- Replace Strategically: Even in low-duty systems, replace O-rings proactively if they’ve been compressed for long durations.
2. Extrusion and Nibbling — When Pressure Pushes Too Hard
What It Looks Like
After disassembly, the O-ring looks like it’s been chewed. You’ll see bits torn off, especially on one side. It may even appear frayed or with chunks missing. Sometimes it looks like it’s been sliced along the low-pressure side.
Why It Happens
Extrusion occurs when high pressure forces the O-ring material into the gap between mating surfaces — especially if that gap is too wide or poorly finished. Over time, this repeated pressure and movement causes material to “nibble” away.
This is common in:
- High-pressure hydraulic systems.
- Poorly machined grooves or oversized clearances.
- Soft or undersized O-ring materials.
How to Prevent It
- Use Backup Rings: In high-pressure systems, back-up rings prevent extrusion by physically blocking the extrusion gap.
- Tighten Your Clearances: Follow precision tolerances for gland design.
- Select the Right Durometer: A harder compound (e.g., 90 Shore A vs 70) resists extrusion better.
- Design for Pressure: For pressures above 1,500 psi, extrusion risk increases dramatically. Reinforce the gland accordingly.
3. Abrasion — When Motion Wears Your Seal to the Bone
What It Looks Like
This failure is easy to spot: the O-ring has a polished or scratched appearance on one side. There may be wear lines, flaking rubber, or a glazed surface. In dynamic systems, it may be thinned or even torn.
Why It Happens
Abrasion is the mechanical wearing down of the O-ring due to relative motion against rough or contaminated surfaces. Think of an O-ring like a tire — if the road is rough or dirty, wear accelerates.
Causes include:
- Lack of lubrication between the seal and hardware.
- Rough metal surface finish.
- Presence of abrasives (like dust or debris) in the sealing area.
- Dynamic motion, especially in pneumatic and hydraulic actuators.
How to Prevent It
- Lubrication is Life: Use compatible greases or oils during installation and in operation.
- Surface Smoothness: Gland surfaces should meet finish requirements, typically <16 microinches for dynamic service.
- Shield from Contaminants: Use wipers, dust seals, and filtration.
- Choose Abrasion-Resistant Materials: Urethane and HNBR offer strong resistance in high-motion environments.
4. Chemical Attack & Swell — When the Seal Soaks Up Trouble
What It Looks Like
Your O-ring feels swollen or bloated — it’s grown in size and doesn’t fit back into its groove. Or maybe it’s cracked, discolored, gooey, blistered, or even smells odd. In severe cases, it may feel sticky or start to crumble.
Why It Happens
Chemical incompatibility is a leading cause of O-ring failure, especially in fluid-heavy systems. Certain fluids, gases, or aggressive chemicals penetrate the rubber structure, altering its physical and chemical makeup. This can result in:
- Swelling (volume increase)
- Hardening or softening
- Blistering from trapped gases
- Embrittlement or cracking
Common culprits include:
- Hydrocarbons (fuels, oils)
- Strong acids or bases
- Steam or oxidizing agents
- Exotic gases in aerospace or lab use
How to Prevent It
- Know Your Media: Before selecting a material, identify all chemicals your O-ring may contact — including flushes, lubricants, and cleaning agents.
- Use Compatibility Charts: Cross-reference your fluid with material ratings (e.g., NBR, EPDM, FKM, FFKM).
- Upgrade Materials: If swelling is recurrent, consider high-performance elastomers like Kalrez® or Chemraz®.
- Temperature & Chemical Combo: Even a compatible material can fail if exposed to high heat and chemicals together — always check dual resistance.
5. Thermal Degradation — When Heat Turns Tough Rubber Brittle
What It Looks Like
The O-ring is hard as a rock or cracked like dry earth. When flexed, it may snap or shatter. In some cases, the surface looks charred or darkened. If UV or ozone damage is involved, you might see fine surface crazing.
Why It Happens
Excessive heat accelerates the breakdown of elastomers. High temperatures cause internal cross-linking to go wild, turning once-flexible rubber into a stiff, brittle material. UV and ozone exposure add to the damage — especially outdoors or near electric motors and welders.
Key contributors include:
- Operating above the compound’s max continuous temperature.
- Thermal cycling (hot-cold-hot) causing expansion and contraction fatigue.
- Radiation exposure (UV, ozone).
- Poor airflow or trapped heat in static seal areas.
How to Prevent It
- Use Temperature-Resistant Compounds: FKM, Silicone, and FFKM offer excellent high-temp performance. NBR and EPDM are more limited.
- Watch for Heat Build-Up: Ensure seals aren’t in “heat traps” without cooling or airflow.
- Protect from UV/Ozone: Use shielding, enclosures, or UV-resistant compounds for outdoor systems.
- Regular Replacement: Heat damage is cumulative — even if a system runs fine, the material may degrade slowly. Schedule seal replacements accordingly.
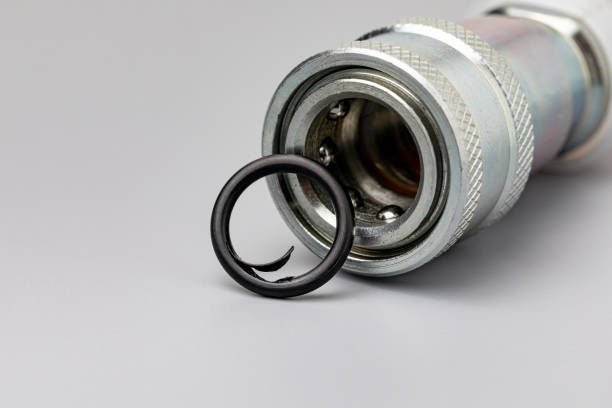
6. Installation Damage & Spiral Failure — Self-Sabotage at Startup
What It Looks Like
You pull out the O-ring and see nicks, cuts, or tiny gouges — often at edges or seams. In other cases, especially in dynamic piston systems, there are long spiral cuts along the O-ring’s surface, like someone twisted it during installation.
Why It Happens
Installation damage is one of the most preventable — and most common — types of O-ring failure. It’s a classic “human error” issue, often caused by rushing or ignoring best practices. Common causes include:
- Dragging the O-ring across sharp metal edges.
- Twisting during assembly, creating stress concentrations.
- Forcing an oversized O-ring into a tight gland.
- In dynamic seals, long stroke lengths can induce spiraling if there’s insufficient guidance or lubrication.
How to Prevent It
- Chamfer & Polish Edges: Always smooth out sharp edges and burrs on hardware.
- Lubricate: Apply a compatible lubricant during installation to ease sliding and prevent friction burns.
- Use Installation Tools: Avoid screwdrivers or metal tools; use tapered cones, soft picks, or installation sleeves.
- Twist Test: After installation, check that the O-ring lies flat and isn’t twisted in its groove.
- Dynamic Design Smarts: In high-stroke systems, consider anti-spiral O-ring designs or switch to a different sealing technology like T-seals or quad rings.
7. Explosive Decompression (Rapid Gas Decompression) — When the Pressure Bites Back
What It Looks Like
The O-ring appears pitted, blistered, or cracked — like it’s been hit from within. Pieces may flake off or disintegrate. In severe failures, the seal might split or blow out entirely. Damage is usually sudden and catastrophic.
Why It Happens
This failure mode occurs in gas systems, especially at high pressures (above 500 psi). When gas is pressurized over time, it permeates the O-ring’s elastomer structure. If that pressure is released too rapidly, the internal gas expands faster than it can escape — blowing microbubbles in the rubber, causing surface tears or complete rupture.
It’s most often seen in:
- Downhole oil and gas tools.
- Aerospace systems using nitrogen, helium, or hydrogen.
- Subsea equipment exposed to pressurized gases.
How to Prevent It
- Use RGD-Rated Materials: Rapid Gas Decompression (RGD) tested compounds are specifically designed to resist blistering under sudden decompression.
- Control Pressure Drops: If possible, release pressure in stages to allow gas to safely escape the seal material.
- Monitor Gas Types: Smaller molecules like hydrogen and helium are more aggressive and permeate faster.
- Design for Safety: In critical applications, use O-ring designs and materials specifically certified for explosive decompression resistance.
Conclusion
O-ring failures aren’t just annoying — they’re often expensive, disruptive, and dangerous. But here’s the truth: nearly every O-ring failure is preventable. When you approach sealing with the mindset of a professional, you’re not just reacting to breakdowns — you’re engineering resilience into your systems.
What separates pros from problems?
- Proper material selection based on the exact media, temperature, pressure, and environmental conditions.
- Precision in design and installation, ensuring gland tolerances, clearances, and lubrication are spot-on.
- Routine inspections and proactive maintenance — replacing seals before they fail.
- Upgrades when needed: When your system evolves, your O-ring strategy should too. Don’t just replace — reassess.
By mastering these failure modes, and avoiding the traps that cause them, you won’t just prevent leaks — you’ll extend equipment life, improve safety, and reduce downtime. That’s the mark of a true O-ring professional.
FAQs
Q1: How do I know if my O-ring material is compatible with my application?
A: Check detailed compatibility charts that match elastomer compounds to your fluid, temperature, and pressure. Be thorough — even short-term exposure to incompatible media can cause long-term failure.
Q2: Is harder always better when choosing an O-ring material?
A: Not necessarily. Harder durometers resist extrusion but may not seal as well at low pressures or conform to irregular surfaces. It’s about finding the right balance for your application.
Q3: How often should I replace O-rings?
A: It depends on service conditions. For static seals in mild environments, you may get years of service. In dynamic, high-temp or chemical-exposed systems, frequent inspection and scheduled replacement is crucial.
Q4: Can I reuse an O-ring after disassembly?
A: It’s not recommended. Even if it looks undamaged, reusing O-rings increases the risk of failure due to invisible wear, compression set, or contamination.
Q5: What’s the best lubricant for O-ring installation?
A: Use a lubricant compatible with both the O-ring material and the system media. Silicone grease works well in many cases, but petroleum-based oils can damage some compounds like EPDM.


