
In hydraulic systems, the tightness of American Standard fittings is critical for ensuring system stability and safety. Properly controlling the tightness during installation not only enhances performance but also improves the durability of the system. In this blog, we will discuss the importance of tightness control, common installation mistakes, material selection, and essential maintenance tips to help you avoid costly errors and ensure reliable operation of your hydraulic systems.
Why Tightness Control Matters
The correct tightness of fittings ensures a stable and secure connection, which is critical in preventing leaks, loosening, or damage. In environments with high pressure, vibration, or extreme temperatures, the importance of proper fitting tightness becomes even more evident. Improper installation can lead to serious issues:
- Loose Fittings: If the fittings are too loose, they may cause leakage, detachment, or system inefficiency.
- Over-tightened Fittings: Excessive tightening can deform the fitting, damage the threads, or lead to cracking under high-pressure conditions.
Maintaining the correct balance is essential to avoiding these issues and ensuring your fittings perform reliably.
Common Installation Mistakes
When installing hydraulic fittings, it’s important to avoid these common errors:
- Over-tightening: This can distort or crack the fittings, leading to decreased performance and premature wear.
- Under-tightening: Loose fittings will eventually leak or become unstable, compromising the entire system.
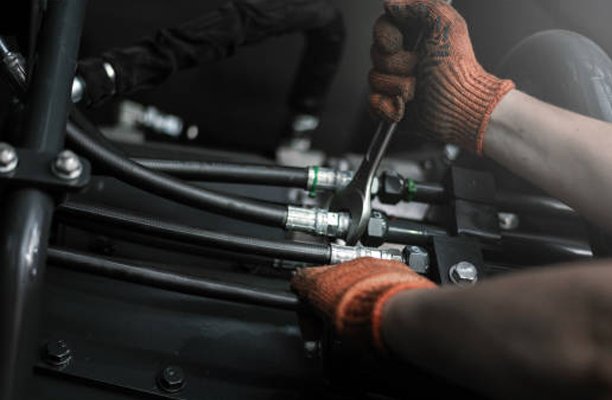
- Using Incorrect Tools: The use of improper tools, like standard wrenches, can lead to uneven tightening. It is always best to use tools like torque wrenches, which allow you to precisely measure and control the tightening force applied.
By preventing these mistakes, you can ensure that your hydraulic systems operate smoothly and efficiently from the outset.
Steps for Controlling Fitting Tightness
Ensuring the correct tightness of American Standard fittings involves following specific steps during the installation process. Here’s a practical guide to help you achieve the perfect tightness:
1. Gather the Right Tools
Before installation, ensure you have the necessary tools, including:
- Torque Wrench: For precise control over tightness, preventing both under- and over-tightening.
- Lubricants: Some fittings may require a thin application on threads or O-rings.
- Manufacturer’s Specifications: Always refer to the torque specifications provided by the fitting manufacturer for the correct tightening range.
2. Prepare the Fitting and Hose
Ensure the fitting and hose are clean and free of debris. Follow these steps:
- Inspect Threads: Check for any damage on the fitting’s threads before installation.
- Apply Sealant: For fittings requiring thread sealant, apply it sparingly to avoid clogging the threads.
3. Hand-Tighten First
Start by hand-tightening the fitting. This helps ensure that the threads engage properly, reducing the risk of cross-threading and misalignment.
4. Use a Torque Wrench for Final Tightening
After hand-tightening, use a torque wrench to apply the recommended force:
- Follow Torque Specifications: Check the values for your specific fitting type and material.
- Avoid Over-tightening: Once you reach the specified torque, stop tightening to prevent damage.
5. Check the Connection
After tightening, inspect the fitting to ensure proper seating and alignment. Conduct a pressure or operational test to verify the connection is secure and leak-free.
6. Monitor After Installation
Regularly check the fittings post-installation, especially in systems subject to vibrations or fluctuating pressures. Look for signs of loosening or leaks and adjust if necessary.
Material Compatibility and Selection

Fittings made from different materials perform differently under various environmental conditions. Common materials include:
- Stainless Steel: Known for its resistance to corrosion, stainless steel fittings are perfect for harsh environments such as those involving chemicals, saltwater, or moisture.
- Brass: Brass fittings are a cost-effective solution for standard applications where the operating pressures and temperatures are moderate.
- Titanium: In applications requiring exceptional strength and resistance to extreme heat, titanium fittings provide the durability necessary to withstand demanding conditions.
Choosing the correct material based on the environment in which the fitting will operate ensures that the system remains durable and free from premature failures.
Proper Maintenance for Longevity
Once installed, maintaining the fittings properly is key to extending their lifespan and ensuring consistent performance. Follow these guidelines for optimal maintenance:
- Regular Inspections: Check the fittings for signs of wear, leaks, or damage, especially in high-vibration areas.
- Correct Hose Routing: Ensure that hoses are routed in a way that prevents excessive bending or kinking, as improper routing can place undue stress on the fittings.
- Cleanliness: Clean all components before installation to prevent dirt, debris, or contaminants from entering the system, which can compromise the fitting’s seal and lead to malfunctions.
Performing regular maintenance and inspections helps identify potential problems early, which can save on repair costs and downtime.
Different Types of Fittings and Sealing Methods
American Standard fittings come in various types, each offering different sealing mechanisms for different needs:
- ORB (O-Ring Boss): This type is designed for high-pressure systems and offers a reliable seal through an O-ring, ideal for hydraulic applications.
- JIC (Joint Industry Council): Featuring a 37-degree flare design, JIC fittings are widely used in systems requiring high-pressure connections with easy maintenance.
- ORFS (O-Ring Face Seal): ORFS fittings are commonly used in environments where high pressure and vibration are prevalent, ensuring leak-free performance in challenging conditions.
Understanding the types of fittings and their sealing methods helps you choose the right one for your system, ensuring reliability and longevity.
Enhancing Efficiency and Reducing Costs
Proper control of fitting tightness directly impacts system efficiency and overall cost savings. Incorrect installation can result in frequent adjustments, leaks, or breakdowns, leading to increased downtime and higher maintenance costs. By ensuring the correct tightness and using appropriate materials, you can significantly enhance system performance, reduce unnecessary repairs, and extend the life of your hydraulic systems.
Conclusion
Controlling the tightness of American Standard fittings is vital for maintaining the quality, stability, and performance of hydraulic systems. By avoiding common mistakes, selecting the right materials, conducting proper maintenance, and choosing the appropriate fitting types, you can improve your system’s efficiency and save on operational costs. Paying close attention to tightness during installation ensures that your fittings perform reliably, extending the life of your equipment and minimizing potential issues down the line.


