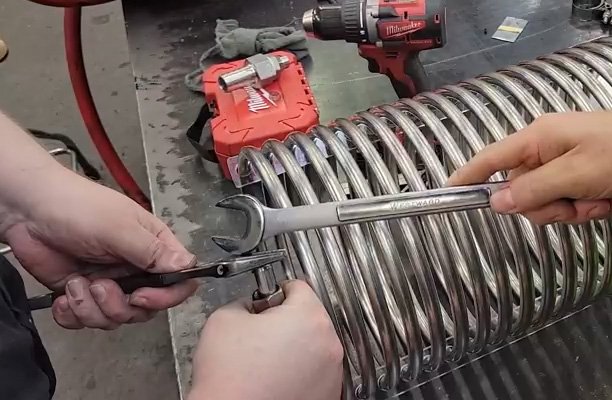
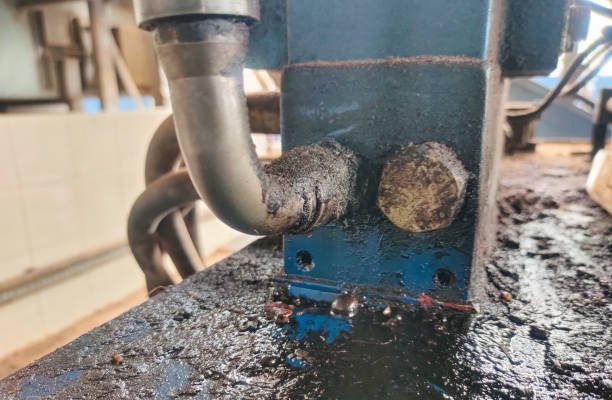
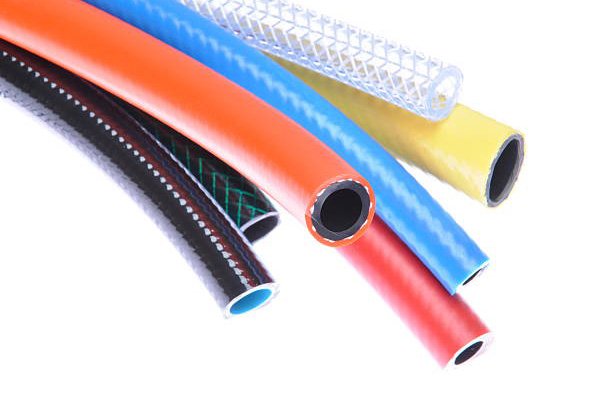
Compression fittings are a staple in plumbing and gas line installations. They provide a secure, leak-free connection without the need for welding, soldering, or adhesives. However, the success of a compression fitting relies heavily on proper installation, especially when it comes to tightening. Go too loose, and you risk leaks. Go too tight, and you can damage the components, rendering the connection ineffective.
In this guide, we’ll explore the anatomy of compression fittings, why achieving the correct tightness is critical, and step-by-step instructions to get it just right. Whether you’re a weekend DIYer or an experienced professional, this guide will help you tackle compression fittings with confidence.
1. What Are Compression Fittings?
Compression fittings are connectors designed to create a watertight or airtight seal. They are often used in plumbing, heating, and gas systems. Here’s what makes them unique:
Key Components
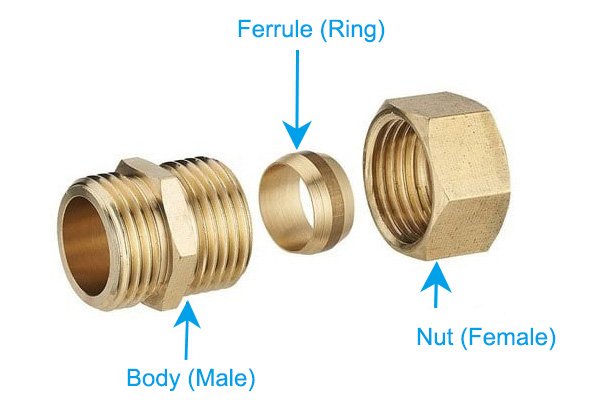
- Compression Nut: This is the threaded outer part that screws onto the fitting body and compresses the ferrule.
- Ferrule (Ring): The ferrule, usually made of brass or plastic, is a small ring that forms the seal by compressing onto the pipe.
- Fitting Body: The main component that connects to the pipe or valve.
How They Work
When you tighten the compression nut, it presses the ferrule tightly onto the pipe, creating a secure seal between the pipe and the fitting body. This eliminates the need for soldering or adhesives, making installation faster and easier.
Applications
Compression fittings are versatile and widely used in:
- Water supply lines for faucets, sinks, and toilets.
- Gas lines for stoves and heaters.
- Industrial applications where precision connections are required.
2. Why Does Proper Tightness Matter? Understanding the Risks
Compression fittings rely on a delicate balance of mechanical pressure. When you tighten the nut, it presses the ferrule against the pipe and the fitting body, forming a tight seal. The compression mechanism:
- Prevents leaks by blocking gaps where fluids or gases can escape.
- Holds the pipe securely in place, preventing disconnection under pressure.
However, since the ferrule and fitting materials are often softer metals like brass or even plastics, too much force or too little force can compromise the seal.
Risks of Under-Tightening
If a compression fitting is not tightened enough, several problems can occur. Here’s why under-tightening should be avoided:
- Leaks and Water Damage
The most immediate and noticeable consequence of under-tightening is leakage. Since the ferrule doesn’t compress fully, gaps remain between the pipe, ferrule, and fitting body, allowing water or gas to escape. In plumbing applications, this can lead to:- Dripping water that damages surrounding areas like walls, floors, or cabinets.
- Mold or mildew growth in areas with prolonged exposure to moisture.
- Water wastage, which increases utility bills and isn’t environmentally friendly.
- System Inefficiency
In gas or pressurized systems, under-tightening can result in a loss of pressure. This inefficiency reduces the performance of your plumbing or HVAC system. For example:- Gas fittings might leak, leading to insufficient flow for stoves or heaters.
- Pressurized water systems might experience reduced output.
- Safety Hazards
- In Gas Lines: Leaks in gas systems pose serious risks, including fire or explosion hazards.
- In Pressurized Systems: A loose fitting under high pressure can blow off suddenly, causing injury or equipment damage.
- Weakened Connection Over Time
Even if the fitting doesn’t leak immediately, vibration or pipe movement can loosen an under-tightened connection over time. For example:- Appliances like washing machines or dishwashers create vibrations that can weaken loose fittings.
- Thermal expansion or contraction (due to temperature changes) can cause slight shifts in the pipes, making the connection more vulnerable.
Risks of Over-Tightening
While under-tightening poses its own challenges, over-tightening can be just as problematic—if not worse. Applying too much force when tightening a compression fitting can damage both the fitting and the pipe itself. Here’s why over-tightening is a big no-no:
- Damaged Threads
Over-tightening can strip the threads on the compression nut or fitting body. Once the threads are stripped:- The fitting becomes impossible to tighten further.
- You’ll need to replace the damaged components, increasing time and costs.
- Crushed Ferrules
The ferrule (often made of brass, copper, or plastic) is designed to compress but not deform excessively. When you over-tighten:- The ferrule gets crushed or distorted, which compromises its ability to form a proper seal.
- This can actually cause leaks, defeating the entire purpose of the fitting.
- Deformed Pipes
Over-tightening can damage the pipe itself, particularly if it’s made of a softer material like copper or plastic. The excessive pressure can:- Dent, crack, or deform the pipe, making it unusable.
- Lead to leaks or pipe failure over time, especially under high pressure.
- Stress on the Fitting Body
Compression fittings, especially those made of softer metals like brass, can crack or split under excessive force. This kind of damage is often irreversible and can compromise the entire connection. - Difficult Repairs or Maintenance
When you over-tighten a fitting, it can become incredibly difficult to loosen or remove later. This makes future repairs or modifications more challenging and time-consuming.
3. General Guidelines for Tightening Compression Fittings
While each fitting may have specific manufacturer guidelines, these general rules of thumb apply to most compression fittings:
Step 1: Hand Tighten First
Start by screwing the compression nut onto the fitting body by hand. Make sure it’s snug but don’t force it.
Step 2: Use a Wrench
Once the nut is hand-tight, use an adjustable wrench or spanner to tighten it further. Typically, an additional 1/4 to 1/2 turn is enough.
Step 3: Test for Leaks
Turn on the water or gas supply and inspect the fitting for leaks. If a small leak is present, tighten the nut slightly (1/8 turn at a time) until the leak stops.
Important Note: Always refer to the manufacturer’s instructions for specific recommendations. Some fittings may require torque specifications, especially in industrial applications.
4. Tools You’ll Need for Proper Tightening
Having the right tools can make the job easier and help you achieve the correct tightness without overdoing it. Here’s a list of essentials:
Must-Have Tools
- Adjustable Wrench: Perfect for gripping and tightening the nut.
- Spanner Wrench: Ideal for smaller fittings or tight spaces.
Optional Tools
- Torque Wrench: Some fittings have specific torque requirements, and a torque wrench ensures precise tightening.
- Pipe Cutter: If you need to cut the pipe to size, a pipe cutter ensures a clean, straight edge.
Pro Tip
When using a wrench, be careful not to overtighten. Apply firm pressure but stop as soon as you feel resistance increasing significantly.
5. Step-by-Step Installation Guide for Compression Fittings
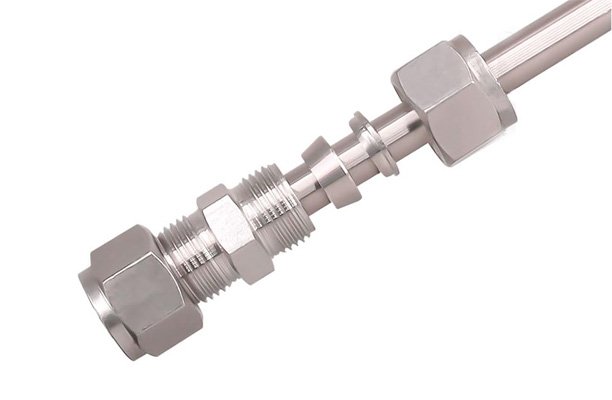
Let’s go through the process of installing and tightening a compression fitting, step by step:
Prepare the Pipe and Fitting
- Clean the pipe and fitting to remove any debris or residue.
- Ensure the pipe is cut squarely and has no burrs.
Assemble the Components
- Slide the compression nut and ferrule onto the pipe.
- Insert the pipe into the fitting body, ensuring it seats fully.
Hand Tighten
- Screw the compression nut onto the fitting body by hand until it’s snug.
Tighten with a Wrench
- Using a wrench, tighten the nut an additional 1/4 to 1/2 turn.
Check for Leaks
- Turn on the water or gas supply and inspect the fitting for leaks. If necessary, tighten slightly until the leak stops.
6. Common Mistakes of Tight Compression Fittings to Avoid
Even experienced installers can run into issues with compression fittings. Here are some common mistakes to watch out for:
- Over-Tightening: Leads to damaged threads, deformed ferrules, or cracked pipes.
- Skipping the Ferrule: Forgetting the ferrule results in a poor seal, rendering the connection useless.
- Misalignment: Always ensure the pipe is properly aligned with the fitting body to prevent leaks.
- Reusing Old Components: Avoid reusing ferrules or compression nuts, as they are designed for single use only.
7. Conclusion
Installing compression fittings might seem intimidating at first, but once you understand the basics, it’s a straightforward process. The key is to avoid over-tightening or under-tightening and always follow the manufacturer’s guidelines.
By using the proper tools, techniques, and a little patience, you can achieve a leak-free and secure connection that will stand the test of time. Whether you’re working on a small DIY plumbing fix or a professional installation, mastering compression fittings is an essential skill.
Got questions or tips about working with compression fittings? Share them in the comments below, and let’s keep the conversation flowing!
8. FAQs
How tight should compression fittings be?
Hand-tighten the nut until snug, then use a wrench to give it an extra 1/4 to 1/2 turn. Avoid overtightening to prevent damage.
Can I reuse compression fittings?
You can reuse the fitting body, but the ferrule and nut are usually single-use. Replacing them ensures a proper seal.
What do I do if my compression fitting is still leaking?
If your compression fitting leaks after proper installation:
- Double-check that the pipe is fully inserted into the fitting body.
- Ensure the ferrule is properly positioned and not damaged.
- Tighten the nut slightly (by no more than 1/8 turn at a time) and recheck for leaks.
If the leak persists, disassemble the fitting, inspect the components for damage, and replace the ferrule or nut if necessary.
4. Should I use Teflon tape or pipe sealant on compression fittings?
No, Teflon tape or pipe thread sealant is not needed for compression fittings. The seal is created by the ferrule compressing against the pipe and fitting body, not by the threads. Adding tape or sealant could interfere with the connection and compromise the seal.
Can I overtighten a compression fitting?
Yes, over-tightening is a common mistake that can damage the fitting or pipe. Over-tightening can crush the ferrule, deform the pipe, or strip the threads on the nut or fitting body. To avoid this, stop tightening as soon as you feel resistance increasing significantly after the initial 1/4 to 1/2 turn with a wrench.
Are compression fittings suitable for all pipe materials?
Compression fittings work best with rigid pipes like copper, brass, or hard plastic. They are not ideal for flexible pipes or hoses, as the ferrule cannot properly compress and seal. Always confirm compatibility with the pipe material and consult the manufacturer’s guidelines before using compression fittings.

