
Accurate O-ring measurement is not just a routine task; it is an essential process to ensure the proper functionality of systems across various industries. O-rings, though small and often overlooked, play a vital role in creating seals that prevent leaks, maintain pressure, and support machinery’s integrity. Without accurate measurements, even the highest quality O-rings can fail to perform their role effectively. This article provides a comprehensive guide to measuring O-rings accurately, offering practical advice, insights into tools, and expert tips to help you get the job done right.
What Are O-Rings?
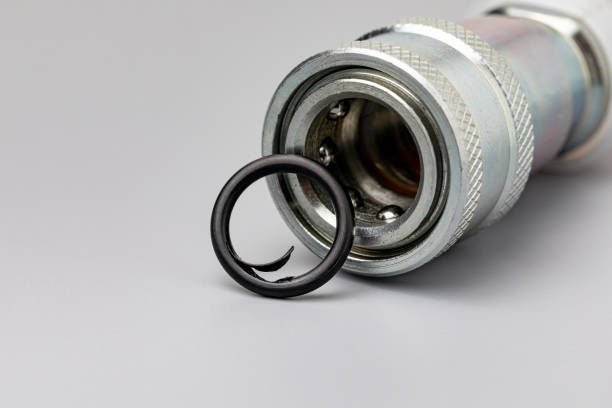
O-rings are circular seals typically made of elastomeric materials like rubber, silicone, or nitrile. They are designed to be placed in grooves between two surfaces, compressing to create a seal that prevents liquids or gases from escaping. While they appear simple, their functionality is complex, as they must withstand pressure, temperature changes, and wear over time.
O-rings are ubiquitous in industrial, automotive, medical, and household applications. For instance:
- In automobiles, they seal critical systems like fuel injectors and air conditioning units.
- In hydraulic machinery, they ensure pressure is maintained without leaks.
- In plumbing, they create watertight seals in pipes and fixtures.
Their versatility, affordability, and effectiveness make O-rings indispensable in engineering and manufacturing.
Why Accurate Measurements Are Critical
Measuring O-rings accurately ensures that they fit properly and function optimally. A poorly sized O-ring can cause numerous problems, such as:
- Leakage: A loose or undersized O-ring cannot create a proper seal, leading to fluid or gas escaping.
- System Failure: In critical applications, such as hydraulics, a faulty seal can lead to significant machinery damage.
- Increased Maintenance Costs: Misfitted O-rings wear out faster, requiring frequent replacements.
Accuracy also helps prevent delays. In industries where time is money, reordering the correct O-ring after a failed fit can cost businesses valuable time and resources.
Key Dimensions of O-Rings
To measure O-rings accurately, you need to determine the following three dimensions:
Inside Diameter (ID)
The ID measures the open space within the O-ring. It is critical for ensuring the O-ring fits snugly around a shaft or into a groove.
Outside Diameter (OD)
The OD measures the total width of the O-ring, including its material. It determines how the O-ring fits within its housing or cavity.
Cross-Section (CS)
The CS refers to the thickness of the O-ring material, or its profile. The CS must be uniform to ensure that the O-ring maintains even pressure distribution under compression.
Tools for Measuring O-Rings
Measuring O-rings accurately requires the right tools. Some commonly used instruments include:
- Vernier Calipers
- Calipers offer a high level of precision and can measure ID, OD, and CS.
- Digital calipers are particularly useful as they provide exact readings with minimal manual effort.
- O-Ring Measuring Cones
- These are cone-shaped tools with marked graduations for different ID sizes. Simply slide the O-ring over the cone until it fits snugly.
- Specialized Gauges
- O-ring gauges, often used in industrial settings, measure the CS accurately without cutting the O-ring.
While calipers are versatile and widely available, O-ring measuring cones and gauges are specifically designed for this purpose, making them ideal for frequent use.
Preparation Before Measuring
Preparation is key to obtaining accurate results when measuring O-rings. Follow these steps before you begin:
- Clean the O-Ring
Remove any dirt, grease, or debris that could interfere with measurements. Use a lint-free cloth and mild cleaner to ensure a spotless surface. - Inspect the O-Ring
Check for damage, such as cracks, flattening, or deformation. Damaged O-rings may not yield reliable measurements. - Gather the Necessary Tools
Have all the tools you need on hand, such as calipers, measuring cones, or gauges, to avoid interruptions during the process.
Step-by-Step Guide to Measuring

Measuring the Inside Diameter (ID)
- Lay the O-ring on a flat, clean surface.
- Open the calipers wide enough to fit the inside edges of the O-ring.
- Gently close the calipers until they touch the inner walls without compressing the material.
- Read the measurement on the caliper display.
If you’re using a measuring cone, slide the O-ring onto the cone until it fits snugly against a marked ID.
Measuring the Outside Diameter (OD)
- Place the O-ring on a flat surface and ensure it retains its natural shape.
- Open the calipers to fit the outermost edges of the O-ring.
- Carefully close the calipers to measure the widest part of the ring.
Measuring the Cross-Section (CS)
- If measuring a used or damaged O-ring, cut a small section for accuracy.
- Place the section under the calipers or a micrometer to measure its thickness.
- For intact O-rings, use a cross-section gauge to avoid cutting the seal.
Avoiding Common Measurement Errors
Accurate O-ring measurements require precision, careful handling, and the right tools. Even minor mistakes can lead to incorrect sizing, which may result in system failures, leaks, or unnecessary downtime. This section delves deeply into the most common measurement errors, their causes, and how to avoid them.
Common Errors and How to Prevent Them
1. Measuring a Stretched or Deformed O-Ring
One of the most frequent errors is attempting to measure an O-ring that has been stretched or deformed from use. Elastomeric materials, especially those exposed to heat or pressure over time, tend to elongate or lose their original shape.
- Cause: Overuse, improper handling during removal, or natural aging.
- Solution: Allow the O-ring to return to its natural, unstressed state before measuring. If the O-ring remains deformed, consider using a new or unused O-ring from the same batch for accurate measurements.
2. Using Inaccurate or Outdated Tools
Measuring tools, like calipers, cones, or micrometers, can lose accuracy over time due to wear, improper storage, or infrequent calibration.
- Cause: Lack of regular maintenance or calibration of measurement instruments.
- Solution: Calibrate tools regularly according to the manufacturer’s specifications. Use digital calipers for higher accuracy and verify their readings with calibration blocks or standards. Store tools in protective cases to prevent damage.
3. Misalignment of Tools During Measurement
Proper alignment is crucial when using tools like calipers or micrometers. Misalignment can result in inaccurate readings, especially for cross-sections or diameters.
- Cause: Improper positioning of the tool relative to the O-ring.
- Solution:
- Ensure the calipers are perpendicular to the O-ring surface when measuring diameters.
- For cross-sections, close the caliper slowly and ensure both jaws make even contact with the O-ring’s profile.
- Practice steady, consistent handling to maintain alignment during the measurement process.
4. Measuring at Improper Angles
Measuring an O-ring at an angle instead of directly across its diameter or thickness can skew results significantly.
- Cause: Inexperience or rushing the measurement process.
- Solution: Always measure from the widest points of the ID, OD, or CS. Position the O-ring flat on a stable surface and ensure your tool is aligned horizontally or vertically to the plane of the O-ring.
5. Measuring Worn or Damaged O-Rings
O-rings that have been in use for extended periods often exhibit signs of wear, such as cracks, flattening, or surface abrasions. Attempting to measure these can result in errors.
- Cause: Natural wear and tear from prolonged exposure to pressure, heat, or chemicals.
- Solution:
- Visually inspect the O-ring for signs of damage before measurement.
- Replace damaged O-rings with new ones of the same material and specifications.
- If no replacement is available, measure carefully and cross-reference with size charts to estimate the original dimensions.
Environmental Factors That Cause Errors
1. Temperature Variations
Temperature plays a significant role in elastomer behavior. Measuring in environments that are too hot or too cold can lead to size discrepancies due to material expansion or contraction.
- Cause: Elastomers are sensitive to temperature changes, which affect their elasticity and size.
- Solution: Measure O-rings at room temperature (typically 20–22°C or 68–72°F). Avoid direct exposure to heat sources or drafts during the measurement process.
2. Contamination or Debris
Dirt, grease, or other contaminants on the O-ring surface can interfere with tool contact, leading to incorrect readings.
- Cause: Lack of cleaning prior to measurement.
- Solution: Clean the O-ring thoroughly using a lint-free cloth and a mild cleaning agent. Ensure the surface is dry before measuring to prevent slippage or inconsistent readings.
Best Practices to Ensure Accurate Measurements
To achieve reliable and repeatable results, follow these best practices:
- Double-Check Measurements
Take multiple measurements of the same dimension to confirm consistency. For example, measure the ID at different points around the O-ring to ensure uniformity. - Use Appropriate Tools
Match the tool to the size and type of O-ring being measured. For very small O-rings, use micrometers with a fine resolution; for larger O-rings, measuring cones may be faster and more efficient. - Maintain a Steady Hand
Unsteady hands can lead to uneven tool pressure or misalignment. Stabilize the tool on a workbench or flat surface, and avoid applying excessive force. - Understand Material Properties
Recognize how the material of the O-ring (e.g., nitrile, EPDM, silicone) may affect its behavior under measurement. For example, softer materials may compress slightly under the pressure of a caliper’s jaws, requiring a lighter touch. - Account for Tolerances
O-rings are often manufactured with size tolerances specified in their datasheets. Compare your measurements against these tolerances to determine whether the O-ring is within acceptable limits.
Tips for Beginners
- Practice with Spare O-Rings: Before measuring critical components, practice on spare or non-essential O-rings to familiarize yourself with the tools and techniques.
- Document Your Findings: Maintain a log of measurements for future reference. Include details like the tool used, environmental conditions, and the O-ring’s material.
Advanced Techniques for High Precision
- Use Digital Tools: Modern digital calipers and micrometers offer precision down to 0.01 mm, reducing human error and providing a clear readout.
- Employ Optical Methods: For extremely small or high-precision O-rings, optical comparators or microscopes can measure dimensions with unparalleled accuracy.
When to Replace O-Rings
O-rings degrade over time due to heat, pressure, and exposure to chemicals. Signs that it’s time to replace them include:
- Loss of elasticity
- Flattened or worn-out cross-sections
- Visible cracks or splitting
- A brittle texture
Replacing worn O-rings promptly prevents leaks and costly downtime.
Material Considerations for Accuracy
The material composition of an O-ring affects its measurement. Some materials, such as nitrile, are more elastic, while others, like fluorocarbon, are stiffer. Always measure O-rings in their natural state to ensure accuracy.
Using O-Ring Size Charts
Once you have your measurements, compare them with a size chart. These charts list standard O-ring dimensions, including ID, OD, and CS, making it easier to identify or order the correct size.
Conclusion
Measuring O-rings accurately is an essential skill for anyone working with mechanical seals. By understanding the key dimensions, using the appropriate tools, and following a careful process, you can ensure precision and reliability in every application. Accurate measurements not only save time and costs but also enhance the performance and longevity of your systems.
FAQs
How do I measure an O-ring without calipers?
You can use a ruler for a rough estimate, but calipers or measuring cones are recommended for precision.
What should I do if my O-ring measurements don’t match standard sizes?
Check tolerances or consider ordering custom O-rings.
Can I measure an O-ring while it is installed?
Measuring in place is challenging; removing the O-ring yields more accurate results.
Why does an O-ring seem larger after removal?
O-rings can stretch or deform during use. Allow time for them to return to their natural state before measuring.
How do I know if my O-ring is too worn to measure?
Inspect for visible cracks, flattening, or loss of elasticity. These are signs that an O-ring is beyond usable condition.
What’s the best tool for measuring small O-rings?
Digital calipers are excellent for small O-rings, as they provide precision and are easy to handle.


