
Introduction
Hydraulic systems are the muscle behind countless machines — from excavators and bulldozers to factory automation and aircraft. But even the most powerful systems can come to a halt due to something small but critical: hydraulic fitting failure. When fittings crack, leak, or loosen under pressure, they can cause pressure drops, fluid contamination, environmental hazards, and ultimately, complete system breakdown. Spotting the early warning signs of hydraulic fitting failure is crucial for keeping your machinery safe, efficient, and operational.
1. Visible Hydraulic Leaks
What to Look For:
One of the most obvious signs of hydraulic fitting failure is the presence of hydraulic fluid leaks. These leaks may appear as slow drips, a steady stream, or even a fine mist spraying under pressure. While some leaks may be small, they can rapidly worsen if left unaddressed.
Watch for:
- Fluid collecting around the base of a fitting
- Puddles under hydraulic hoses or machinery
- Discoloration or oily residue on machinery surfaces
Leaks are typically most visible around hose ends, coupling points, or transition areas between hoses and metal piping.
Causes:
- Improperly tightened fittings (either under-tightened or over-tightened)
- Damaged or degraded O-rings and seals
- Hairline cracks in the fitting body or threads
- Excessive system vibration loosening the connection
- Mismatched fitting and hose sizes
- Use of incompatible materials (e.g., aluminum in a high-pressure steel system)
How to Fix It:
The first step is to shut down the hydraulic system and relieve all pressure. Carefully clean the fitting area using a degreasing cloth or cleaner to identify the exact source of the leak. Inspect the fitting, threads, and seal for visible damage.
If the O-ring is damaged, replace it. If the fitting itself is cracked or the threads are stripped, you’ll need to replace the entire fitting. Retighten the new fitting using manufacturer-recommended torque specs.
How to Prevent It:
Always use properly rated and compatible fittings for your system. During installation, ensure that fittings are tightened to the specified torque values, and avoid using pipe wrenches which may distort fitting geometry. Also, ensure fittings are not subjected to external forces or vibration. Consider using clamps or supports to relieve stress from the hose/fitting junction.
2. Pressure Loss or Fluctuations
What to Look For:
Another critical sign of hydraulic fitting trouble is unexplained pressure drops or inconsistent performance. When fittings fail internally or allow micro-leaks, system pressure becomes unstable. You might not see fluid leaking, but the pressure gauge tells the story.
Symptoms include:
- Pressure readings lower than expected
- Inconsistent movement or speed of hydraulic actuators
- Difficulty holding loads in position
- Frequent activation of pressure-relief valves
This can make the equipment feel sluggish, or in some cases, cause it to stop functioning entirely.
Causes:
- Minor internal leaks at fitting connections
- Loose or unthreaded connections allowing fluid to escape under pressure
- Air entering the hydraulic circuit through unsealed fitting threads
- Fitting bodies beginning to fail due to fatigue or improper installation
How to Fix It:
Start by isolating sections of the hydraulic system and using pressure gauges to identify where the pressure drop begins. Once isolated, disassemble and inspect each fitting in the affected section. Look for signs of wear, deformation, or poor sealing.
Reassemble using proper torque, replace damaged fittings or seals, and purge the system of any trapped air to restore correct pressure.
How to Prevent It:
Routine system pressure checks can help identify a small drop before it becomes a system-wide problem. Also, during installation or maintenance, fittings should be checked for correct threading and alignment. Avoid cross-threading or reusing old fittings with worn threads. It’s also important to ensure compatibility between the hydraulic fluid and the fitting material, as chemical degradation can reduce fitting integrity.
3. Unusual Noises (Hissing, Whining, or Whistling)
What to Look For:
Strange noises in a hydraulic system are often one of the first signs that air is entering the system — and fittings are often the culprits. If you hear a high-pitched whine, a constant hiss, or a whistling sound from a particular area, take it seriously. Air inside hydraulic lines can lead to cavitation, loss of performance, and permanent damage to pumps and valves.
This issue is commonly overlooked because the system may still seem to be working — just less efficiently or with strange noises.
Causes:
- Air leaks through loose fittings or damaged threads
- Incomplete or poor sealing around the fitting face
- Incorrectly seated O-rings or mating surfaces
- Cracks or pinholes in fittings under vacuum conditions
When a fitting is not sealed properly, it can suck in air, especially on the suction side of a pump. This air mixes with hydraulic fluid and creates aeration — which can reduce lubrication, cause pitting, and damage components.
How to Fix It:
Inspect fittings on the suction side of the system. Look for signs of wear or misalignment. Remove the fitting and inspect the sealing surface and O-ring groove. Replace the O-ring if it’s flattened, torn, or brittle. Apply a suitable thread sealant where appropriate (not all fittings require it), and reinstall using correct torque specifications.
Once reassembled, bleed the hydraulic system to remove trapped air. Run the system through a few cycles and recheck for noises.
How to Prevent It:
Use fittings specifically rated for vacuum or suction applications. These are often designed with enhanced sealing capabilities. Maintain clean installation practices to prevent debris from interfering with seals. Ensure that O-rings are lightly lubricated during installation and not twisted or pinched. For systems exposed to heavy vibration, consider vibration-resistant fittings.
4. Localized Overheating Around Fittings
What to Look For:
While heat is a normal part of hydraulic operations, excessive or uneven heat, especially concentrated around specific fittings or hoses, signals something’s wrong. You might notice certain fittings are significantly hotter to the touch than others, or the surrounding hose insulation is beginning to discolor or degrade. In extreme cases, the fluid may emit a burnt odor near the fitting.
Overheating in a localized area often indicates that fluid is not flowing properly or that internal resistance is building up within or around the fitting.
Causes:
- Internal blockage or partial clogging within the fitting
- Misaligned or undersized fittings creating turbulence and flow restrictions
- Poor fitting design causing sharp direction changes
- Frictional heat caused by micro-leaks under pressure
- Heat conduction from nearby overheating components
- Use of fittings not rated for the temperature range of the application
As flow becomes restricted, hydraulic fluid is forced through narrower spaces, increasing friction and raising the temperature. Over time, this degrades seals and hose material, making the problem worse.
How to Fix It:
Shut down the system and allow it to cool before inspection. Use an infrared thermometer or thermal imaging camera to identify temperature variations. Disassemble the fitting and inspect for signs of blockage, corrosion, internal burrs, or material buildup.
Replace any deformed or heat-damaged fittings with those rated for both the system’s pressure and temperature. If flow restriction is suspected due to fitting size or geometry, upgrade to a larger or smoother-flowing alternative.
How to Prevent It:
Design hydraulic circuits with minimal sharp bends, and use long-radius fittings wherever possible. Ensure fittings are sized properly for both flow and pressure. Avoid installing fittings near components that regularly run hot, such as engines or heat exchangers, unless sufficient shielding is provided. Regularly inspect fittings for signs of scale, carbon buildup, or debris that might cause restriction.
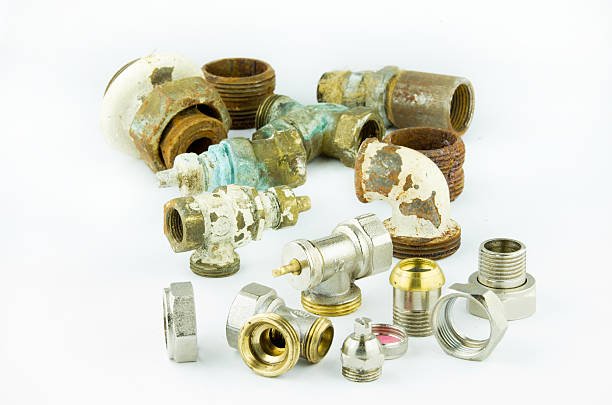
5. Cracks, Corrosion, or Visible Physical Damage
What to Look For:
Hydraulic fittings should have clean surfaces, smooth threads, and no signs of wear. Any visible damage, even minor cracks or corrosion, should be treated as an immediate risk. Cracked fittings can rupture under pressure, while corroded fittings may no longer provide a reliable seal.
Common warning signs include:
- Surface cracks on the body or threads
- Rust or pitting, especially near seams
- Deformed or dented areas from impact or overtightening
- Discoloration or blistering from chemical exposure
Visual inspections are a vital part of hydraulic maintenance — even if the system is running fine, visible signs of wear are often precursors to failure.
Causes:
- Excessive tightening during installation, causing stress cracks
- Use of incompatible materials in corrosive environments
- Physical impacts from tools, machinery, or accidental contact
- Chemical degradation due to exposure to caustic fluids or cleaning agents
- Material fatigue after prolonged exposure to high pressure and vibration
Aluminum and brass fittings are especially vulnerable to cracking and corrosion when exposed to environmental elements or when over-torqued.
How to Fix It:
Remove the damaged fitting immediately. Clean the mating surface and inspect the connected hose or pipe for damage. If corrosion has spread, you may need to replace adjoining parts as well. Always replace with a fitting made of appropriate material — for example, stainless steel in corrosive environments, or high-strength steel in high-pressure systems.
Also, check alignment. Sometimes damage occurs because of excessive stress due to misaligned hoses or rigid piping.
How to Prevent It:
Select fittings made from materials rated for the environmental conditions — for example, zinc-nickel coated steel, 316 stainless steel, or brass for marine and chemical applications. Apply anti-corrosion coatings where needed. Train technicians to use proper torque tools instead of pipe wrenches and avoid cross-threading. Use protective guards or sleeves in high-impact areas. If you operate in outdoor environments, regular corrosion inspections should be part of your scheduled maintenance.
6. Frequent Hose Failures or Hose “Pop-Offs”
What to Look For:
Repeated hose failures near the fitting connection — particularly hose blow-offs or ruptures at the coupling — are often misdiagnosed as hose defects. However, in many cases, the real problem lies in the fitting. If the same hose location keeps failing, that’s your clue.
Symptoms include:
- Hoses detaching from the fitting under pressure
- Cracks near the crimp area
- Swelling or bubble formation near the hose end
- Hoses leaking at the junction despite new replacements
This issue is especially critical in high-pressure systems, as a sudden hose blow-off can create a hazardous spray zone of high-velocity fluid.
Causes:
- Improper crimping or incorrect crimp diameter
- Fitting and hose are from incompatible brands or systems
- Incorrect hose insertion depth into the fitting
- Poorly aligned fittings placing excess stress on the hose
- Contaminants trapped in the fitting before assembly
Crimp-style fittings must be matched precisely to the hose type and size. Mismatches or poor assembly practices can cause fittings to separate from the hose under pressure.
How to Fix It:
Inspect both the fitting and the hose assembly. If the fitting was improperly crimped, the entire hose assembly should be removed and rebuilt using the correct crimp die and settings. Replace with matched components from the same manufacturer, or follow cross-compatibility standards provided by the manufacturers.
Check alignment and routing to reduce hose strain. Secure hoses to prevent movement that could weaken the crimp area.
How to Prevent It:
Standardize your hose and fitting inventory to avoid mismatch. Use a calibrated crimping machine and verify each hose assembly’s crimp specs using go/no-go gauges. During installation, make sure hoses are routed with adequate slack and without sharp bends. Secure hoses with clamps or guides to reduce movement. Avoid re-crimping or reusing fittings, as they’re designed for single use only.
7. Contaminated Hydraulic Fluid
What to Look For:
Contaminated fluid may not seem directly tied to hydraulic fitting failure — but in many cases, failing fittings are the entry point for contaminants. This could include dirt, water, air, metal shavings, or degraded seal material. Over time, contamination leads to component wear, valve sticking, seal erosion, and total system failure.
Symptoms include:
- Milky or foamy hydraulic fluid
- Discolored, darkened, or burned-smelling oil
- Gritty or metallic particles in the reservoir or filter
- Inconsistent system performance
- Filter clogging and premature element failure
Contaminated fluid is often a secondary effect of micro-leaks, cracked fittings, or compromised seals that allow external contaminants in or internal material to break down and circulate.
Causes:
- Damaged or worn seals inside or around fittings
- Cracks in fitting bodies or threads allowing ingress of moisture or dirt
- Corroded fittings shedding rust into the fluid
- Improper assembly allowing ingress during system operation
- Loose connections in low-pressure return lines or suction lines
These contaminants enter under vacuum or low-pressure conditions and mix with the hydraulic fluid, degrading its quality over time.
How to Fix It:
Start by inspecting and replacing any suspect fittings showing signs of wear, rust, or deformation. Drain and filter the hydraulic fluid or perform a complete fluid change depending on the level of contamination. Replace filters and flush the system if necessary. Use a microscope or fluid analysis kit to assess particulate levels and ensure contaminants haven’t damaged internal components.
After cleaning the system, retest with fresh fluid, and monitor closely for recurring signs of contamination.
How to Prevent It:
Use properly sealed fittings with fresh, undamaged O-rings. During assembly, ensure a clean environment, and protect open lines with caps or plugs. Select corrosion-resistant fitting materials where appropriate. Regular fluid sampling and analysis will also help catch early signs of contamination before they lead to system-wide problems.
Understanding the Root Causes of Fitting Failures
While we’ve covered the outward symptoms and signs, it’s important to understand the core causes that lead to hydraulic fitting failure. Addressing these root causes is what separates emergency repairs from long-term system reliability.
1. Poor Installation Practices
The number one cause of hydraulic fitting issues. This includes over-tightening, under-tightening, improper torque application, misalignment during assembly, and the use of mismatched parts. Even a slight thread misalignment can create gaps for leaks or lead to fitting fatigue.
2. Incorrect Fitting Selection
Using the wrong type of fitting — whether it’s the material, thread type, or pressure rating — is a common error. For instance, using NPT fittings in high-vibration environments is risky due to their taper-thread design and lack of mechanical locking.
3. Environmental Exposure
Fittings exposed to outdoor environments, corrosive chemicals, salt spray, or extreme temperatures are at much higher risk. Over time, corrosion compromises the seal and structural integrity of the fitting.
4. Vibration and Shock Loads
Mobile machinery, high-speed actuators, and poorly supported hoses all introduce shock and vibration to fittings. Without proper dampening or hose clamps, these vibrations loosen connections and induce metal fatigue.
5. Aging and Wear
Even properly installed fittings don’t last forever. Seal materials degrade, surfaces wear down, and metal fatigue sets in, especially in systems operating 24/7 under high loads or temperature swings.
Best Practices for Preventing Hydraulic Fitting Failure
Preventing hydraulic fitting issues requires a proactive maintenance strategy. Here’s a set of actionable steps and habits to help keep your system safe and running smoothly:
Select the Right Fitting for the Application
- Match fitting type to pressure, flow rate, fluid compatibility, and environment
- Use stainless steel or coated fittings for corrosive or outdoor settings
- Choose fittings with built-in swivel or vibration-dampening when needed
Follow Correct Installation Procedures
- Use torque wrenches to meet manufacturer torque specs
- Avoid pipe wrenches or overtightening, especially on aluminum and brass fittings
- Ensure O-rings are properly seated, clean, and lubricated
Use Clean Assembly Practices
- Cap all open lines and fittings during storage or maintenance
- Use lint-free rags and seal-compatible lubricants
- Clean threads and surfaces before installation
Inspect Fittings During Scheduled Maintenance
- Include fitting checks as part of your PM schedule
- Look for visible leaks, cracks, or wear
- Use temperature and pressure diagnostics to detect early issues
Replace, Don’t Reuse
- Never reuse O-rings or crushed washers
- Replace any fitting that shows signs of distortion or corrosion
- Discard fittings removed from failed assemblies, even if they “look fine”
Monitor and Test Hydraulic Fluid
- Periodically sample fluid to check for contamination, oxidation, or moisture
- Use inline filters and desiccant breathers to maintain cleanliness
- A fluid cleanliness log can help identify patterns tied to fitting degradation
Conclusion
Hydraulic fittings may seem like small, inexpensive parts — but they’re critical to the safety, reliability, and efficiency of any hydraulic system. Catching the warning signs of fitting failure early — from fluid leaks to noise, overheating, and pressure drops — can save your operation from costly downtime and repairs.
The key takeaway? Inspect often, install carefully, and replace when in doubt.
With the right knowledge, tools, and maintenance habits, you can extend the life of your hydraulic systems and operate with confidence.
FAQs
Can I reuse hydraulic fittings?
In most cases, no. Reusing a hydraulic fitting — especially those with deformable sealing surfaces, crush washers, or once-crimped designs — compromises the integrity of the connection. Always inspect the fitting for damage and replace seals, or better yet, use a new fitting entirely.
How tight should hydraulic fittings be?
It depends on the type of fitting. Use a torque wrench and follow manufacturer torque specifications. Overtightening can damage threads and seals, while undertightening can lead to leaks and pressure loss.
Are all fittings interchangeable?
No. Mixing brands, thread types (BSPT vs. NPT, for example), or systems (metric vs. imperial) can result in poor sealing or mechanical failure. Only use compatible fittings as verified by pressure, thread profile, and material specifications.
How often should fittings be checked?
Hydraulic fittings should be inspected during every routine maintenance check, or more frequently in high-vibration, high-pressure, or corrosive environments. Daily walkarounds for operators should include a visual leak check.
What’s the best way to test for a micro-leak?
Use UV dye leak detection kits, soap-and-water solutions, or specialized electronic leak detectors to find micro-leaks. These methods are safer than pressure testing alone, especially for high-pressure systems.


