When it comes to plumbing repairs, removing a compression fitting can feel like a daunting task, especially if you’re dealing with an older or stubborn connection. But don’t worry—with the right knowledge and tools, you can handle this like a seasoned pro. In this detailed guide, we’ll break down everything you need to know about compression fittings, why they might need removal, and exactly how to remove them safely and efficiently. By the end, you’ll feel confident tackling this common plumbing challenge.
What Is a Compression Fitting, and Why Remove It?
Let’s start with the basics to get a clear picture of what we’re working with.
What Is a Compression Fitting?
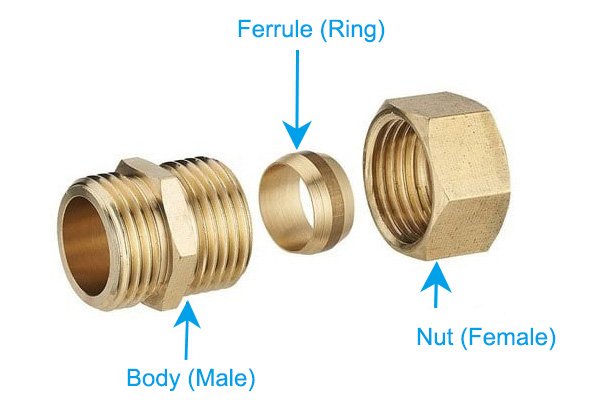
Compression fittings are plumbing connections designed to join two pipes or attach a pipe to a fixture. They are widely used because they don’t require soldering or welding, which makes installation quick and relatively easy. The fitting itself consists of three main components:
- Compression Nut: The threaded component that tightens the fitting.
- Ferrule (Compression Ring): A small ring, usually made of brass or copper, that compresses against the pipe to create a watertight seal.
- Fitting Body: The central piece that connects the pipes or fixtures.
These fittings are most commonly found in water supply lines, like under sinks or in toilet connections.
Why Remove a Compression Fitting?
Here’s why you might find yourself needing to remove one:
- Repairing Leaks: Compression fittings can develop leaks over time due to wear and tear or improper installation.
- Replacing Pipes or Fixtures: If you’re upgrading old plumbing, you’ll likely need to remove existing fittings.
- Remodeling or Reconfiguring Plumbing: During renovations, compression fittings may need to be adjusted or removed entirely.
- Routine Maintenance: Sometimes fittings need to be removed to clean or inspect the pipes they connect.
Removing a compression fitting correctly ensures you avoid damaging the pipes or creating leaks in the process.
Tools You’ll Need
Proper preparation is the key to a smooth removal process. Before starting, gather the following tools and materials:
- Adjustable Wrenches (or Pipe Wrenches)
You’ll need two wrenches—one to grip the compression nut and the other to stabilize the fitting body. - Pliers
Useful for gripping and pulling off components like the ferrule if they’re stuck. - Utility Knife
In some cases, you might need to carefully cut the ferrule to remove it. - Bucket or Towel
Keep a bucket or towel nearby to catch any water left in the pipes. - Penetrating Oil
For older fittings, a penetrating oil like WD-40 can help loosen stubborn nuts. - Safety Gloves
Gloves protect your hands from sharp edges on pipes or fittings.
Having these tools on hand will save you time and frustration during the removal process.
How to Remove a Compression Fitting: Step-by-Step Instructions
Now let’s dive into the actual process. Follow these steps carefully to remove a compression fitting without causing damage.
1. Turn Off the Water Supply
Before doing anything, locate the water supply valve and shut it off completely. This is crucial to avoid flooding or water damage.
- Open a nearby faucet to release pressure and drain residual water from the pipes.
- Place a towel or bucket under the fitting to catch any remaining water.
Pro Tip: If you’re unsure where the water shutoff valve is, check under the sink or near the main water line in your home.
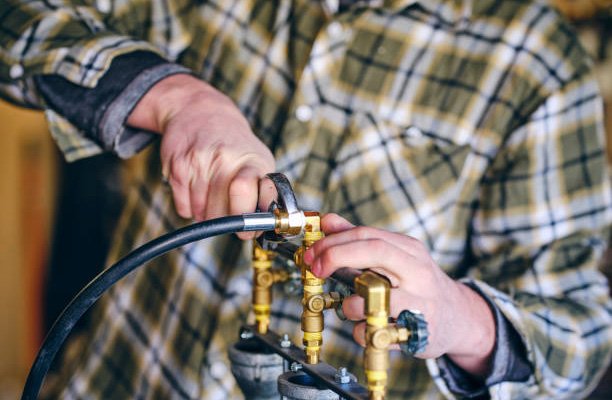
2. Loosen the Compression Nut
This is where the wrenches come into play.
- Use one wrench to grip the compression nut firmly.
- Use the second wrench to hold the fitting body steady to prevent it from twisting.
- Slowly turn the compression nut counterclockwise to loosen it.
Older fittings may require a bit more elbow grease, so don’t rush this step.
Pro Tip: If the nut won’t budge, apply a few drops of penetrating oil and wait 10–15 minutes before trying again.
3. Remove the Compression Nut and Ferrule
Once the compression nut is loose, slide it back along the pipe. This will expose the ferrule and the fitting body.
- Gently pull the ferrule off the pipe.
- If the ferrule is stuck, grip it with pliers and twist gently to loosen it.
Some fittings might be easier to disassemble than others, depending on how long they’ve been in use and the material of the pipe.
4. Cut the Ferrule (If Necessary)
If the ferrule refuses to budge, don’t panic—this is a common issue.
- Use a utility knife to make a small, careful cut along the ferrule’s length.
- Avoid cutting too deeply, as this can damage the pipe underneath.
- Once the ferrule is cut, use pliers to pry it open and slide it off.
Safety Tip: Always wear gloves during this step to avoid injuries from sharp tools or pipe edges.
5. Inspect the Pipe
After removing the fitting, take a close look at the pipe.
- Check for scratches, dents, or residue left behind by the ferrule.
- Clean the pipe with a cloth or sandpaper to ensure a smooth surface for the new fitting.
If the pipe is damaged, you may need to repair or replace it before attaching a new fitting.
How to Loosen Stubborn Compression Fittings
Removing a stubborn compression fitting can be frustrating, but with the right techniques and tools, you can loosen even the most unyielding fittings. Below, we’ll walk you through specific strategies to tackle fittings that just won’t budge.
1. Apply Penetrating Oil
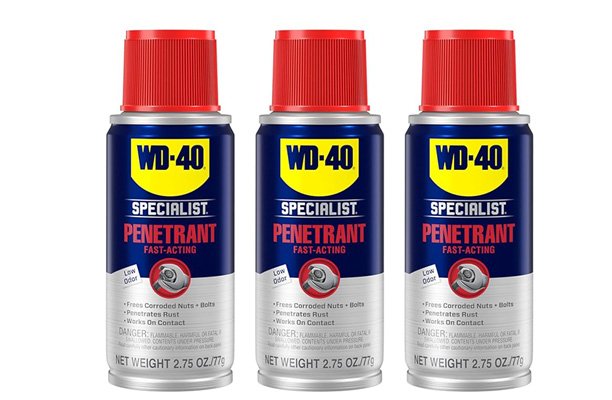
Penetrating oil, like WD-40, is a lifesaver when dealing with corroded or rusted fittings. Here’s how to use it:
- Spray the oil generously around the threads of the compression nut.
- Allow it to sit for 10–15 minutes to seep into the threads and loosen corrosion.
- Try loosening the nut again using wrenches.
Pro Tip: Make sure to clean the fitting with a cloth after applying oil to avoid slipping when using tools.
2. Use Gentle Heat
Heat can help expand the metal slightly, making it easier to loosen the fitting. Here’s how:
- Use a hairdryer or a heat gun on a low setting to warm up the compression nut.
- Focus the heat evenly around the fitting for about 1–2 minutes.
- Once heated, use wrenches to loosen the nut while the metal is still warm.
Warning: Avoid using an open flame (like a torch) near water pipes, especially if the pipe is connected to flammable materials like PVC or plastic.
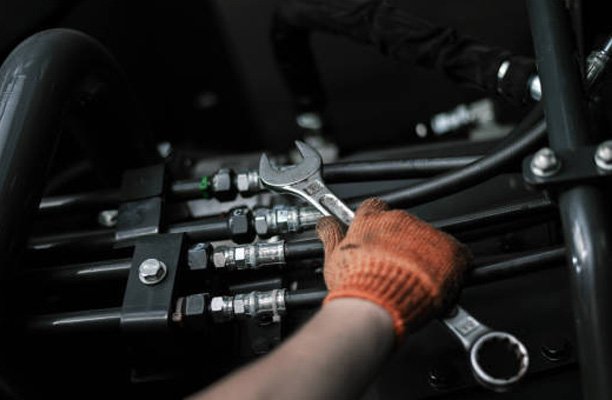
3. Use Two Wrenches for Extra Leverage
If the fitting isn’t budging, you might not be applying enough force. Using two wrenches simultaneously can give you the leverage you need:
- Place one wrench on the compression nut and the other on the fitting body.
- Stabilize the fitting body with one wrench while turning the nut counterclockwise with the other.
- Use controlled, steady pressure to avoid damaging the fitting or pipe.
Pro Tip: For tighter spaces, consider using a basin wrench or specialty plumbing wrench.
4. Tap It Loose with a Hammer
Sometimes a light tap can help break the bond caused by corrosion or over-tightening:
- Hold a wrench on the compression nut to keep it in place.
- Gently tap the wrench with a hammer to create small vibrations that can loosen the nut.
- After tapping, try turning the nut with the wrench.
Caution: Be careful not to hit too hard or you risk damaging the fitting.
5. Cut the Nut or Ferrule (as a Last Resort)
If all else fails, cutting the compression nut or ferrule might be your only option. Here’s how to do it:
- Use a hacksaw or rotary cutting tool to carefully cut through the nut or ferrule.
- Make a small cut and then use pliers to pry it open.
- Be extremely cautious to avoid cutting into the pipe underneath.
Pro Tip: Specialized ferrule removal tools are available to make this process easier and safer.
6. Check for Corrosion or Mineral Buildup
If the fitting has been in place for years, it may be stuck due to mineral deposits or corrosion:
- Use a descaling solution or vinegar to dissolve buildup.
- Apply the solution around the fitting and let it sit for about 20 minutes.
- After cleaning, try loosening the fitting again.
7. Use a Compression Fitting Puller Tool
For particularly stubborn fittings, you can purchase or rent a compression fitting puller tool:
- This tool is designed to grip the ferrule and compression nut securely while applying even pressure to pull them off.
- It’s especially helpful if you’re dealing with soft copper pipes that can be easily damaged.
Common Challenges and How to Solve Them
Removing compression fittings isn’t always straightforward. Here are some common issues and how to handle them:
- Stubborn Nut or Ferrule: Use penetrating oil or gentle heat (like a hairdryer) to loosen stubborn components.
- Damaged Pipe: If the pipe gets damaged during removal, consider cutting the affected section and installing a new one.
- Leaking After Reassembly: Double-check that all components are properly tightened and aligned before restoring water flow.
Conclusion
Removing a compression fitting doesn’t require expert plumbing skills, but it does demand patience and attention to detail. By following these steps and tips, you can avoid the most common pitfalls and successfully remove even the most stubborn fittings.
FAQs
1. Can I reuse a compression fitting?
Yes, you can reuse the fitting body and nut, but the ferrule should typically be replaced because it becomes deformed during installation and may not seal properly the second time.
2. What tools do I need to remove a stuck compression fitting?
For stuck fittings, you’ll need two wrenches, pliers, a utility knife, and possibly penetrating oil to break up corrosion or grime.
3. How do I avoid damaging the pipe?
Apply only moderate force when removing the ferrule or nut, and use sharp, precise tools to avoid cutting into the pipe.
4. What if I can’t remove the ferrule?
If the ferrule is truly stuck, carefully cut it with a utility knife or a ferrule remover tool. If this doesn’t work, you may need professional assistance.
5. What if the compression fitting is stuck?
If the fitting is stuck, apply penetrating oil or gently heat the area with a hairdryer to loosen it. In extreme cases, you may need to cut the ferrule with a utility knife.
6. Do I need to call a plumber to remove a compression fitting?
Not necessarily! With the right tools and this guide, most homeowners can handle it themselves. However, if you’re unsure or dealing with complex plumbing, it’s always a good idea to consult a professional.


