Introduction
Removing a rubber hose from a barbed fitting might sound simple, but without the right technique, you risk damaging the hose, the fitting, or even injuring yourself. Whether you are a DIY enthusiast, mechanic, or maintenance technician, knowing the correct procedure will save you time and money. This comprehensive guide covers multiple safe and effective methods to remove rubber hoses from barbed fittings while preserving both components.
Barbed fittings are widely used in automotive, plumbing, industrial, and garden applications. Over time, hoses may become stiff, bonded, or corroded onto the barbs, making removal challenging. Fortunately, this guide will teach you step-by-step how to handle this task easily and safely, using methods recommended by industry professionals.
Understanding Barbed Fittings and Rubber Hoses
What is a Barbed Fitting?
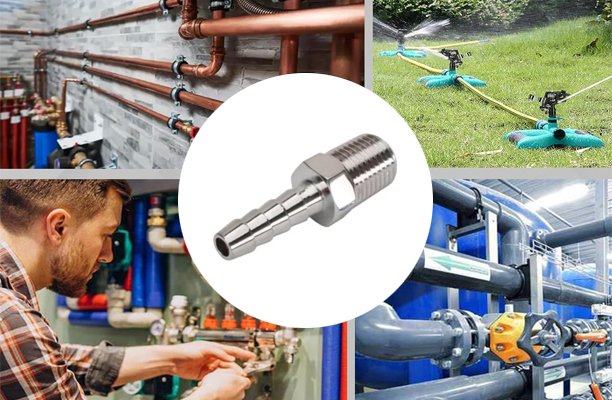
A barbed fitting is a type of connector featuring sharp ridges or barbs along its shaft. These barbs grip the inside of the rubber hose, creating a secure and leak-resistant connection. Barbed fittings are commonly made of brass, plastic, stainless steel, or aluminum, depending on the application.
Common Types of Rubber Hoses
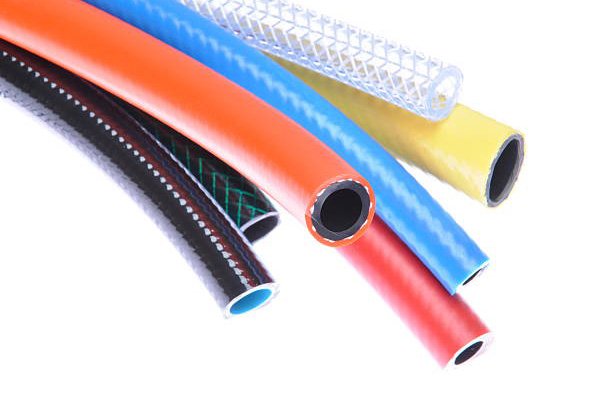
Rubber hoses come in various types, including fuel lines, coolant hoses, air hoses, and garden hoses. Each hose type has different flexibility, wall thickness, and material strength, which can influence how easily it comes off the barbed fitting.
How Barbed Fittings Work with Hoses
The ridged design of barbed fittings creates friction and mechanical grip between the hose and fitting. In many cases, clamps or hose clips are added to reinforce this connection. However, over time, rubber can harden or shrink, making the hose adhere stubbornly to the barbs.
Tools You Will Need
Basic Tools
- Flathead screwdriver
- Slip-joint or needle-nose pliers
- Utility knife
- Work gloves
Optional but Helpful Tools
- Heat gun or hair dryer
- Silicone spray or penetrating oil
- Hose removal pick or hook tool
Safety Gear Checklist
- Protective eyewear
- Heat-resistant gloves (if using heat)
- Fire extinguisher (recommended if heat is involved)
Using the right tools will not only make the job easier but will also minimize the risk of damaging the hose or fitting. Remember, preparation is key to successful hose removal.
Preparation Before Removing the Hose
Inspect the Hose and Fitting
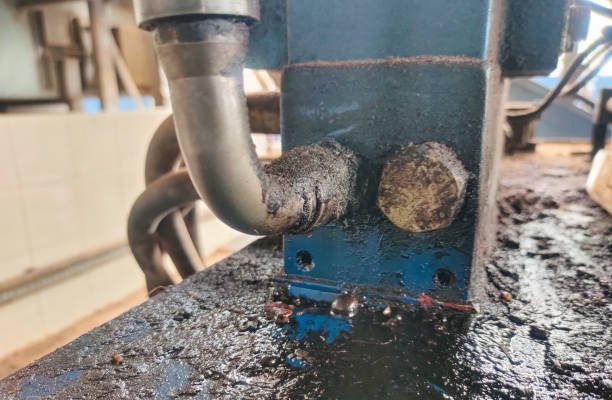
Before attempting to remove the hose, carefully inspect both the hose and barbed fitting. Look for signs of wear, cracks, rust, or damage. If the hose appears brittle or deteriorated, removal may require extra caution to prevent it from tearing or crumbling during the process.
Ensure Safety First
Always make sure the system you are working on is depressurized and turned off. For automotive hoses, allow the engine to cool completely. For pressurized systems, release any built-up pressure safely before starting. Wear your safety gear, including gloves and protective eyewear, to prevent injury from flying debris or hot components.
Release Pressure from the System
Whether you are dealing with fuel, coolant, air, or water hoses, releasing pressure is essential to avoid sudden bursts or spills. Locate the pressure release valve or safely loosen a connected component to relieve any residual pressure. Only proceed with hose removal when you are certain the system is fully depressurized.
Method 1: Manual Hose Removal
When to Use the Manual Method
This method works best when the hose is still flexible and not heavily bonded to the fitting. It is the simplest and most common technique for hose removal in automotive and plumbing tasks.
Step-by-Step Manual Removal Process
- Remove the clamp: Use a flathead screwdriver or pliers to loosen and remove the clamp securing the hose to the fitting.
- Twist the hose: Grasp the hose firmly and try to twist it gently back and forth to break the bond with the barbed fitting.
- Pull steadily: Once loosened, pull the hose straight off the fitting using steady force. Avoid sudden jerks that could damage the hose or fitting.
- Use a flathead screwdriver: If the hose is stuck, carefully insert a flathead screwdriver between the hose and the fitting to help pry it loose. Be cautious not to puncture or tear the hose.
For older or hardened hoses, additional methods may be necessary.
Method 2: Using Heat to Loosen the Hose
Suitable Situations for Applying Heat
Heat is useful when dealing with aged or stiff rubber hoses that resist manual twisting and pulling. By applying heat, you can soften the rubber, making it more pliable and easier to remove without damaging the fitting.
Step-by-Step Guide to Safe Heat Application
- Choose the heat source: Use a heat gun on a low setting or a hair dryer. Avoid open flames to reduce fire risk.
- Heat the hose: Direct heat evenly around the hose for 30-60 seconds. Do not overheat, as excessive heat can degrade the rubber.
- Twist and remove: After heating, immediately attempt to twist and pull the hose. The softened rubber should release more easily from the barbed fitting.
Safety Precautions While Using Heat
- Never apply heat near flammable liquids or vapors.
- Wear heat-resistant gloves and protective eyewear.
- Always work in a well-ventilated area.
Proper heat application can make hose removal significantly easier, but it should be used carefully to avoid damaging the hose or injuring yourself.
Method 3: Using Lubricants for Easier Removal
Types of Lubricants You Can Use
Lubricants are highly effective when the hose is stubborn but not too degraded. You can use:
- Silicone spray (safe for most rubber types)
- Penetrating oil (WD-40, PB Blaster, etc.)
- Dish soap and water mixture
Silicone spray is the most recommended as it is rubber-safe and provides excellent slip without leaving harmful residues.
Proper Lubrication Techniques
- Apply lubricant: Spray a small amount of lubricant around the edge of the hose where it meets the fitting. Allow it to seep in for a few minutes.
- Twist and pull: After the lubricant has worked in, twist the hose gently to break the seal, then pull it off the barbed fitting.
Cleaning After Lubricant Use
After removal, thoroughly clean both the fitting and the hose (if you plan to reuse it) to remove any lubricant residue. This is crucial to ensure a secure connection when reinstalling the hose or fitting a new one.
Method 4: Cutting the Hose as a Last Resort
When Cutting is Necessary
Cutting the hose should be your final option when other methods fail, or the hose is too brittle or fused to the fitting. This approach sacrifices the hose but can save the fitting from damage.
Safe Cutting Techniques to Avoid Damage
- Use a sharp utility knife: Carefully slice along the length of the hose without pressing too deep to avoid nicking the barbed fitting.
- Peel the hose: Once you have made a lengthwise cut, pry the hose open with a flathead screwdriver and peel it off gently.
Proper Disposal of Cut Hose
Dispose of the cut hose responsibly according to local waste management regulations. Many rubber materials are recyclable if taken to appropriate facilities.
Removing a Hose without Damaging the Barbed Fitting
Tips for Protecting the Barbed Fitting
- Always avoid prying directly against the barbs with metal tools.
- Use plastic picks or blunt tools when possible.
- Do not apply excessive heat, which could warp plastic fittings or compromise metal ones.
Signs of Potential Damage
After removing the hose, inspect the barbed fitting for:
- Deformed or bent barbs
- Corrosion or pitting
- Sharp edges or burrs
What to Do If the Fitting Gets Damaged
If the fitting is damaged beyond minor scratches, consider replacing it. A compromised fitting may lead to leaks or hose failure under pressure, especially in automotive and hydraulic systems.
Post-Removal Inspection and Maintenance
Inspecting the Fitting After Hose Removal
Once the hose is removed, carefully inspect the barbed fitting for signs of damage, rust, or debris buildup. Pay close attention to the integrity of the barbs as they are essential for creating a tight seal with the new hose.
Cleaning the Fitting
Use a wire brush, cloth, or compressed air to remove dirt, old lubricant, or hardened rubber remnants from the fitting. For metal fittings, mild rust removers can be applied if corrosion is present. Ensure the fitting is dry and clean before reinstallation.
Preparing the Fitting for New Hose Installation
Before fitting a new hose, apply a compatible lubricant or anti-seize compound to the barbed area. This helps with smooth installation and will make future removals easier. Make sure not to over-lubricate, as excess lubricant may cause slippage under pressure.
Tips to Make Future Hose Removals Easier
Preventive Maintenance
Regularly inspect and service your hoses and fittings as part of your maintenance routine. Early detection of cracks, wear, or stiffening can prevent more complicated removal procedures later.
Using Anti-Seize or Compatible Lubricants in Advance
Before installing a hose, lightly coat the barbs with a rubber-safe lubricant or anti-seize compound. This helps create a firm seal while still allowing for easier removal in the future. Avoid petroleum-based products unless verified safe for your hose type.
Best Practices for Hose Installation
- Do not over-tighten clamps, as it may deform the hose.
- Ensure the hose is properly aligned before securing it to avoid twisting or stress.
- Mark the hose and fitting to make future alignment and removal easier.
Common Mistakes to Avoid
Forcing the Hose Aggressively
Never yank or twist the hose excessively without proper loosening techniques. This could cause internal damage to the barbed fitting or rupture the hose, making removal even harder.
Overheating the Hose
Excessive heat can weaken or melt rubber hoses, deform plastic fittings, and cause safety hazards. Always use controlled, moderate heat to soften the hose when needed.
Ignoring Safety Measures
Always wear gloves, protective eyewear, and follow safety protocols. Skipping these precautions can lead to injuries, burns, or accidental damage to surrounding components, especially in automotive and pressurized systems.
FAQs About Removing Rubber Hoses from Barbed Fittings
Can I Reuse the Hose After Removal?
It depends on the condition of the hose. If the hose remains flexible, undamaged, and free from cracks, you can reuse it. However, always inspect the interior for signs of wear before reinstalling.
Is it Safe to Use WD-40?
Yes, WD-40 can help loosen a stuck hose. However, it may not be compatible with certain rubber compounds in the long term. For temporary hose removal, it’s fine, but clean the fitting thoroughly afterward to prevent slippage when reinstalling.
What is the Best Lubricant for Hose Removal?
Silicone spray is generally considered the safest and most effective lubricant for hose removal. It is rubber-safe, reduces friction, and does not degrade the rubber material.
How Do I Remove a Hose in Tight Spaces?
Use specialized hose removal picks, curved pliers, or flexible shaft tools designed for confined areas. Applying a small amount of lubricant and heating carefully can also help in tight spots.
How Do I Know if the Barbed Fitting is Still Good?
Inspect for bent or broken barbs, rust, or pitting. If the barbs are intact and the fitting surface is smooth and clean, it is likely still in good working condition.
Expert Tips for Smooth Hose Removal
Insights from Mechanics and DIY Experts
Professionals recommend patience and preparation. Most difficult hose removals result from rushing or skipping inspection steps. Take your time and follow each method carefully for a safer and cleaner job.
Case Studies and Real-Life Scenarios
Automotive technicians often deal with stuck coolant hoses that have hardened over time. In most cases, combining heat with lubrication allows for successful removal without cutting. Similarly, DIY gardeners removing hoses from irrigation systems benefit from using heat and silicone spray rather than forcing the hose off by hand.
Recommended Tools by Professionals
- Plastic or brass hose picks
- Silicone-based lubricants
- Adjustable heat gun (with temperature control)
- Curved needle-nose pliers for tight spaces
Conclusion
Removing a rubber hose from a barbed fitting doesn’t have to be frustrating. By understanding the nature of barbed fittings, using the right tools, and following professional techniques, you can easily remove even the most stubborn hoses without causing damage. Choose the method that best fits your situation—whether it be manual removal, heat application, lubrication, or cutting. Most importantly, always prioritize safety and take your time to avoid costly mistakes. Proper maintenance and preparation can make future hose removal a much simpler task.
Bonus: Printable Quick Checklist for Hose Removal
- Inspect hose and fitting for damage
- Release system pressure safely
- Prepare safety gear (gloves, eyewear)
- Try manual removal (twist and pull)
- Use heat if hose is stiff (30–60 seconds)
- Apply silicone spray if needed
- If all else fails, cut the hose carefully
- Inspect and clean the fitting after removal
- Apply anti-seize or lubricant before reinstalling a new hose
- Avoid common mistakes (force, overheating, unsafe work)
FAQs
1. Can I remove a rubber hose without any tools?
Yes, in some cases where the hose is flexible and not aged, you may remove it by twisting and pulling by hand. However, tools make the process safer and more efficient.
2. What if the hose is stuck due to corrosion?
If corrosion is present, applying penetrating oil and allowing it to soak for a few hours can help loosen the hose. In severe cases, you may need to carefully cut the hose.
3. Is heat safe for all types of hoses?
Not all hoses respond well to heat, especially plastic or vinyl hoses. Use moderate heat and always check the material specifications of the hose before applying heat.
4. How often should I inspect hoses for maintenance?
It is recommended to inspect hoses during every routine maintenance or at least every six months, depending on the system and environment they are used in.
5. Should I replace the hose even if I successfully remove it?
If the hose shows any signs of wear, hardening, cracking, or permanent deformation, it is safer to replace it rather than reuse it. A compromised hose may fail under pressure.


