Installing new pipe fittings is a critical task in plumbing projects, whether you’re dealing with a simple DIY repair or a large-scale project. The secret to success? Properly preparing your pipes to ensure a snug, leak-free, and durable connection. In this guide, we’ll dive deep into each step of preparing pipes for new fittings, covering everything from selecting the right tools to cleaning and securing your fittings.
Why Preparing Pipes Matters (More Detailed Insight)
You might think skipping the prep work saves time, but that’s a recipe for disaster. Poorly prepared pipes can result in:
- Leaky connections that compromise the entire plumbing system.
- Reduced longevity of the fittings due to corrosion or stress at the joints.
- System inefficiency, which might lead to costly repairs or replacements later.
Imagine installing a new faucet only to find out the pipe isn’t sealed properly—it’s not just inconvenient, but it could cause water damage too. Taking the time to clean, cut, and prepare your pipes ensures a strong connection and peace of mind.
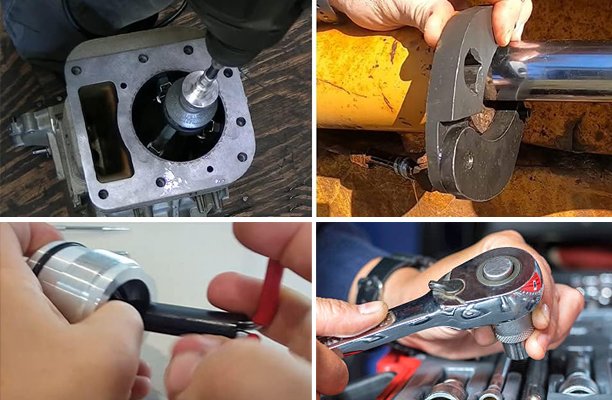
Step 1: Gather Your Tools and Materials (Why Each Tool Matters)
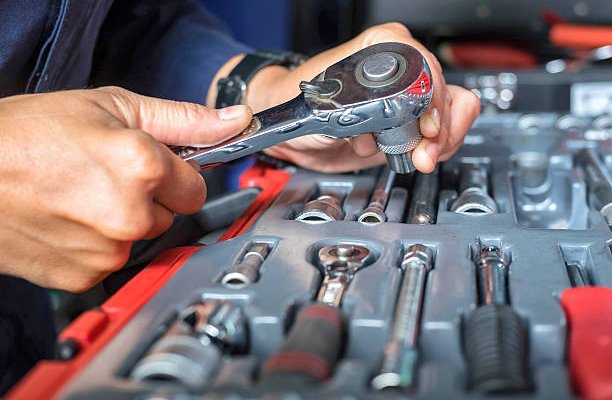
Before you get started, it’s essential to have the right tools. Here’s why each one is important:
- Pipe cutter or hacksaw: Ensures clean, even cuts, which are crucial for proper sealing. A jagged cut will create gaps.
- Deburring tool or file: Removes rough edges or burrs from the pipe that could damage the fitting or O-ring.
- Sandpaper or emery cloth: Cleans and smooths the pipe surface, improving adhesion and sealing.
- Cleaning solution: Removes grease, grime, or debris. For PVC pipes, use pipe primer; for copper, rubbing alcohol or dish soap works well.
- Safety gear: Protects your eyes and hands while cutting, filing, or handling chemicals.
- Tape measure and marker: Helps with accurate measurements and markings for precise cuts.
Why preparation matters: With the right tools on hand, you’ll avoid delays and ensure the job gets done efficiently.
Step 2: Measure and Mark Your Pipes (The First Step Toward Perfection)
Proper measurements are non-negotiable when preparing pipes for fittings.
- How to do it:
- Use a tape measure to determine the exact length of the pipe you need.
- Mark the cutting line clearly with a marker or pencil.
- Double-check your measurements.
- Why this matters: Even being off by a fraction of an inch can throw off the entire fitting, leaving you with an improper connection that’s prone to leaking or misalignment.
Pro Tip: If your fittings involve elbows or joints, factor in the depth of the fitting’s socket when measuring the pipe.
Step 3: Cut the Pipe (Techniques for a Clean Cut)
Cutting the pipe is a critical step, but how you cut it depends on the pipe material:
- For PVC Pipes:
- Use a PVC pipe cutter. These cutters are designed to make clean, precise cuts quickly.
- If you don’t have a cutter, a hacksaw works, but you’ll need to be extra careful to cut straight.
- For Copper Pipes:
- Use a tubing cutter. Clamp the cutter onto the pipe and rotate it around the pipe, tightening it gradually with each turn.
- This technique ensures a straight, clean edge that doesn’t deform the pipe.
- For Steel Pipes:
- Use a hacksaw or a reciprocating saw with a metal-cutting blade.
- Take your time, and use a guide to keep the cut straight.
Pro Tip: Always secure the pipe in place with a clamp or vice while cutting to avoid accidents and uneven cuts.
Step 4: Deburr the Edges (Eliminating Hidden Problems)
Cutting pipes often leaves behind burrs—those sharp, jagged edges that can cause several problems. Burrs can tear seals, disrupt the flow of water, or even cause leaks over time.
- Tools for deburring:
- Use a dedicated deburring tool for the quickest and smoothest results.
- A round file can also work for metal pipes.
- For PVC pipes, sandpaper or an emery cloth does the trick.
- Step-by-step:
- Run the deburring tool or file around the inner and outer edges of the pipe.
- Smooth out any rough spots until the edge feels clean to the touch.
Step 5: Clean the Pipe Ends (The Secret to a Proper Seal)
Cleaning might sound basic, but it’s an essential step for ensuring a leak-free connection.
- PVC Pipes:
- Apply PVC cleaner or primer to remove dirt and prepare the surface for the adhesive.
- Wipe off excess cleaner with a clean, dry cloth.
- Copper Pipes:
- Use an emery cloth to sand the outer surface of the pipe until it’s shiny.
- Finish by wiping the pipe with a clean cloth to remove any residue.
- Steel Pipes:
- Use rubbing alcohol or soapy water to clean off grease, grime, or metal shavings.
Pro Tip: Avoid touching the cleaned surface with your fingers, as oils from your skin can interfere with the sealant or solder.
Step 6: Inspect for Damage (Don’t Overlook This Step)
Before moving forward, inspect your pipes and fittings for damage. Small issues now can become big problems later.
- What to check:
- Cracks or hairline splits in the pipe.
- Warping or bending, especially for PVC pipes.
- Threads on steel pipes—ensure they’re not worn or stripped.
What to do if you find damage: Replace the damaged pipe or fitting immediately. It’s not worth risking a faulty connection.
Step 7: Dry Fit the Connection (Practice Makes Perfect)
Before sealing the connection permanently, perform a dry fit to test the alignment.
- PVC Pipes: Slide the pipe into the fitting without applying adhesive.
- Copper Pipes: Assemble the pieces loosely to confirm they fit together correctly.
- Steel Pipes: Thread the pipe into the fitting by hand to check the threads align.
Dry fitting allows you to identify and fix any alignment issues before committing to the final connection.
Step 8: Secure the Fittings (Finalizing the Connection)
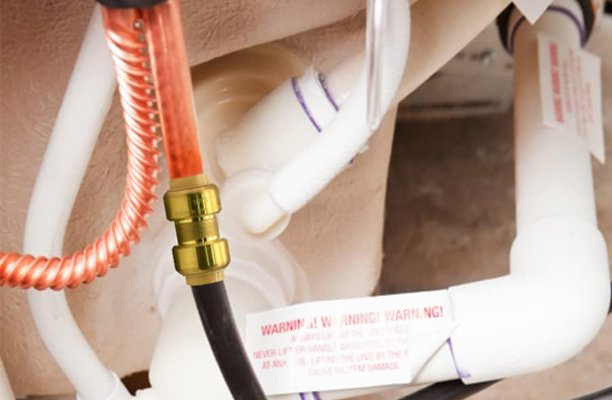
Once everything fits perfectly, it’s time to make the connection permanent:
- PVC Pipes:
- Apply PVC cement to both the pipe and fitting.
- Push the pipe into the fitting firmly and hold for 10–15 seconds.
- Allow the cement to cure as per the manufacturer’s instructions.
- Copper Pipes:
- Apply flux to the cleaned area and fitting.
- Heat the joint with a propane torch and feed solder into the connection until it forms a seal.
- Steel Pipes:
- Wrap Teflon tape or pipe joint compound around the threads for a watertight seal.
- Use a wrench to tighten the connection securely.
Pro Tip: Avoid over-tightening as it can crack fittings or deform threads.
Common Mistakes to Avoid (Learning from Others’ Experience)
- Skipping the cleaning process – Even minor dirt can ruin the connection.
- Not deburring the pipe edges – Burrs can create gaps in the seal.
- Rushing the process – Proper curing time is essential for adhesives and solder.
- Using the wrong materials – Always match your tools and techniques to the type of pipe.
Conclusion
Properly preparing pipes for new fittings isn’t just about following steps—it’s about ensuring the longevity and reliability of your plumbing system. By taking the time to measure, clean, and inspect everything, you’ll save yourself headaches and costly repairs down the line.
FAQs
Q1: Can I reuse old fittings?
A: It’s not recommended as old fittings may be worn or damaged, increasing the risk of leaks.
Q2: How do I ensure my cuts are straight?
A: Use a pipe cutter for precision. If using a hacksaw, use a clamp and guide for a straight cut.
Q3: What happens if I skip deburring?
A: Burrs can cause leaks, reduce flow, and damage O-rings or seals.
Q4: How long should I wait before testing my connection?
A: The wait time depends on the material and method used. For PVC pipes, let the cement cure for at least 15–30 minutes before handling and 24 hours before applying pressure. For copper pipes, you can test the connection as soon as the solder cools, typically within a few minutes. Steel pipes can be tested immediately after tightening, but ensure your sealant or Teflon tape is properly applied.
Q5: What’s the difference between PVC cleaner and primer?
A: PVC cleaner removes dirt, grease, and debris from the pipe’s surface, while primer softens the PVC material to prepare it for cement bonding. Some PVC adhesives combine both in a single product, but using a separate primer is recommended for a stronger and more reliable bond.
Q6: Can I cut pipes without specialized tools?
A: While it’s possible to use tools like a hacksaw instead of a pipe cutter, you may end up with uneven cuts or rough edges that require extra deburring and sanding. For best results, invest in a tool designed for your pipe material—it’ll save time and ensure a cleaner, more professional finish.


