Introduction
Removing a rubber hose from a barbed fitting may sound like a simple task, but without the right approach, it can quickly become frustrating—or even damaging to your equipment. Barbed fittings are designed to create a tight seal with hoses, making them secure but also difficult to separate. Whether you’re working on an automotive engine, a garden irrigation system, or home plumbing, knowing how to safely and effectively detach a rubber hose is essential for maintenance and replacement.
This comprehensive guide walks you through the best practices, step-by-step instructions, and expert tips to ensure you get the job done without damaging your hose or barbed fitting. Let’s get started with the basics.
Understanding Barbed Fittings and Rubber Hoses
What is a Barbed Fitting?
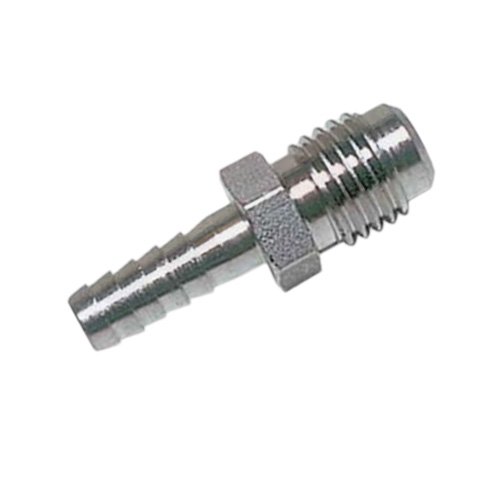
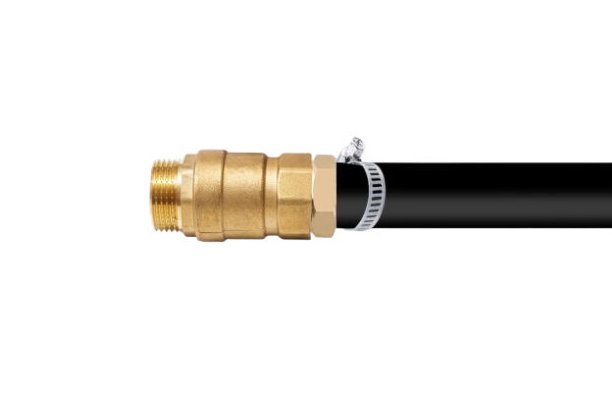
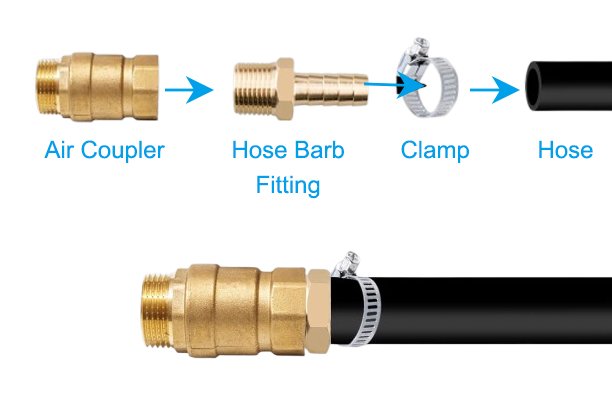
A barbed fitting is a type of connector with ridged or “barbed” edges designed to grip the inside of a rubber hose. These ridges ensure a tight, leak-proof connection, especially when paired with a hose clamp. Barbed fittings are commonly used in low-pressure fluid and air systems because they provide a secure yet flexible solution for connecting hoses to other components.
Why Rubber Hoses Are Commonly Used
Rubber hoses are flexible, resilient, and resistant to various environmental conditions, making them a popular choice in automotive, industrial, and household applications. Their stretchability allows them to form a strong grip around barbed fittings, minimizing leaks and ensuring durability.
The Science of the Tight Seal
The gripping power of a rubber hose around a barbed fitting comes from the elasticity of the hose material and the mechanical resistance offered by the barbs. This creates a compression fit that can be extremely tight—so tight that improper removal can lead to cracks, ruptures, or damage to the fitting itself. That’s why using the correct method is critical.
Tools and Materials You’ll Need
Essential Tools
- Slip-joint pliers or hose clamp pliers
- Flathead screwdriver (for prying or removing clamps)
- Utility knife or hose cutter (for last-resort cutting)
Optional Tools for Stubborn Hoses
- Hose removal tool or pick set
- Heat gun or hair dryer (for thermal expansion)
- Penetrating oil or lubricant spray
Safety Gear and Precautions
- Protective gloves to prevent cuts and burns
- Safety glasses to shield your eyes from debris or sprays
- Work apron or old clothes to protect from fluid splashes
Gathering all your tools and protective gear ahead of time not only makes the process smoother but also much safer. Prevention is better than injury when dealing with tight fittings and sharp tools.
Preparations Before You Start
Turn Off Water or Air Supply
Before you begin any hose removal process, make sure the system is completely shut down. If the hose is part of a water or air line, turn off the supply valve and release any remaining pressure in the line. This prevents accidental sprays, which could lead to injury or property damage.
Ensure Safe Working Conditions
Clear your workspace of clutter, flammable materials, or anything that might interfere with your tools. Work in a well-lit, ventilated area, especially if you’re planning to use penetrating oil or a heat gun. Make sure your footing is stable and your body is positioned in a way that allows for safe leverage.
Assessing Hose Condition
Examine the rubber hose for signs of cracking, brittleness, or deformation. Older hoses may be more prone to tearing or breaking during removal, while newer hoses might resist detachment due to elasticity. Knowing the hose condition helps determine which removal technique is most appropriate.
Method 1: Manual Pull and Twist Technique
Step-by-Step Instructions
- Loosen and remove any hose clamps securing the hose to the fitting.
- Grip the hose near the fitting with both hands.
- Twist the hose back and forth gently to break the seal.
- Once loosened, pull the hose straight off the fitting.
Best Cases for This Method
This approach works best on relatively new hoses that are still flexible and when the hose has not been exposed to prolonged heat or chemical wear. If the hose moves with some resistance but no cracking sounds, this is likely the right method.
Tips to Make It Easier
- Apply a small amount of lubricant around the fitting before twisting.
- Warming the hose slightly with your hands or ambient heat can increase flexibility.
- Use rubber-grip gloves to improve traction and reduce hand fatigue.
Method 2: Use of Pliers or Hose Removal Tool
Proper Tool Handling
If the manual method fails, the next best step is to use tools for extra grip and leverage. Slip-joint pliers can be used to gently squeeze and rotate the hose. Alternatively, a hose removal tool—designed to slide between the hose and fitting—can break the seal more cleanly.
Avoiding Hose or Fitting Damage
Always apply force gradually and evenly. Never yank or jerk the hose, as this can rip the hose or bend the barbed fitting. When using metal tools, be cautious not to puncture or cut into the hose wall or the fitting itself.
When to Use This Method
Use tools when the hose is still pliable but too tight for manual removal, or when twisting by hand is not enough. This method is also ideal when dealing with thicker or reinforced rubber hoses that resist stretching.
Method 3: Heat Application Method
How to Safely Use a Heat Gun or Hot Water
Heating the hose causes the rubber to expand slightly, loosening its grip on the barbed fitting. You can use a heat gun, hair dryer, or even soak the end of the hose in hot water. Direct the heat only at the portion covering the barbed fitting to avoid damaging the rest of the hose.
Ideal Temperature Range
Keep the temperature between 120°F to 150°F (49°C to 65°C). This range softens the rubber without degrading it. Avoid open flames or industrial torches, which can scorch or melt the hose and pose a serious fire risk.
Safety Considerations
- Always wear heat-resistant gloves to protect your hands.
- Maintain a safe distance between the heat source and flammable objects.
- Use temperature-controlled tools to prevent overheating the rubber.
This method is especially effective for hoses that are flexible but stubborn due to temperature or chemical exposure over time.
Method 4: Cutting the Hose (Last Resort)
When Cutting is Necessary
If all other methods fail or the hose is already damaged beyond reuse, cutting it off is the safest way to prevent damage to the barbed fitting. This is particularly relevant when dealing with old, hardened hoses that have fused to the fitting.
Safe Cutting Techniques
- Use a sharp utility knife or hose cutter for a clean, controlled slice.
- Make a longitudinal cut along the hose, not across, to avoid damaging the fitting barbs.
- If necessary, make two parallel cuts and peel the hose back for easier removal.
Cleaning the Barbed Fitting Afterward
Once the hose is removed, inspect the fitting for leftover debris or fragments. Use a wire brush, cloth, or fine sandpaper to clean it thoroughly. Removing residue ensures a good seal when installing the new hose.
Removing Stubborn or Aged Hoses
Dealing with Dried, Brittle Hoses
Over time, rubber becomes dry and brittle, especially when exposed to UV rays or harsh chemicals. In such cases, removal may require a combination of heat, lubricant, and cutting. Always handle brittle hoses with care to avoid cracking them into pieces that may be hard to extract.
Using Lubricant or Penetrating Oil
Applying a small amount of lubricant (such as silicone spray or WD-40) between the hose and fitting can significantly reduce friction. Allow the lubricant to sit for a few minutes before attempting removal. Avoid petroleum-based lubricants if the fitting or hose will be reused, as they may degrade rubber over time.
Warning Signs of Damaged Fittings
- Visible rust or corrosion around the barbs
- Bent or crushed barbed tips
- Loosening or spinning fittings
If you notice any of these signs, the fitting may need replacement to ensure a secure and leak-free new installation.
Cleaning and Inspecting the Barbed Fitting
Why Cleaning Is Crucial
After removing the old hose, cleaning the barbed fitting is essential to ensure a secure connection for the new hose. Residue, dirt, or corrosion on the barbs can compromise the seal, leading to leaks or premature wear of the new hose.
Best Tools for Cleaning
- Wire brush or brass brush for scrubbing off rust and grime
- Compressed air to blow out debris from grooves
- Isopropyl alcohol or degreaser to dissolve sticky residue
Checking for Corrosion or Wear
Inspect the barbs closely. Look for signs of:
- Pitting or rust, which indicates corrosion
- Flattened or deformed barbs that could weaken the seal
- Cracks or splits in plastic fittings
If any of these issues are present, consider replacing the fitting to ensure system integrity.
Installing a New Hose
How to Choose the Right Replacement
Select a hose that matches the inner diameter (ID) of the fitting and is rated for the pressure and fluid type used in your application. Ensure compatibility with the environment—UV-resistant hoses for outdoor use, heat-resistant hoses for engine compartments, etc.
Best Practices for Installation
- Lubricate the barb lightly with soapy water or a rubber-safe lubricant to ease insertion.
- Align the hose and push it firmly over the barbed fitting in one smooth motion.
- Ensure the hose fully covers all barbs for a secure seal.
Using Clamps for Better Sealing
Reinforce the connection with a hose clamp placed directly over the barbs. Tighten the clamp securely but avoid over-tightening, which could cut into the hose and weaken the seal. Worm gear, spring, or Oetiker clamps are commonly used depending on the system requirements.
Common Mistakes to Avoid
Overusing Tools or Force
Using excessive force or the wrong tools can damage both the hose and fitting. For example, prying too hard with a screwdriver can puncture the hose, while over-squeezing with pliers might deform the fitting.
Ignoring Hose Condition
Trying to reuse an old, brittle, or cracked hose is a common mistake. Even if it seems functional, it’s likely to fail sooner than expected. Always inspect the hose thoroughly before deciding to reuse it.
Skipping Lubrication
Not using lubrication during removal or installation can make the job harder and increase the risk of damage. A small amount of rubber-safe lubricant can dramatically ease both processes and ensure a better seal.
Troubleshooting Tips
Hose Won’t Come Off: What to Try Next
If the hose still won’t budge after trying manual pulling, tools, heat, and lubricant, try combining multiple methods. For example, apply heat followed by gentle prying with a hose pick, or use a lubricant and twist with pliers. Allow lubricant to soak in for 5–10 minutes before retrying removal.
Fitting Got Damaged: Replacement Options
If the barbed fitting is bent, corroded, or cracked during the removal process, it’s best to replace it. Most hardware stores offer a range of fittings in brass, plastic, or stainless steel. Make sure the replacement matches the hose size and application pressure requirements.
Leak After Re-installation
If you notice a leak after installing the new hose, it’s likely due to one of these issues:
- Hose not pushed fully onto the barb
- Clamp not tightened properly or incorrectly positioned
- Damaged or dirty barbs preventing a proper seal
Remove and reinstall the hose carefully, ensuring a tight, clean connection.
Safety Tips and Maintenance Advice
Regular Inspection Schedule
Inspect your hoses and fittings at least once per season or every few months if in high-use environments. Look for leaks, cracks, corrosion, or signs of wear and tear. Proactive maintenance helps prevent failures and costly repairs.
Preventive Maintenance
- Keep hoses clean and dry when not in use
- Store hoses out of direct sunlight to reduce UV degradation
- Periodically lubricate barbed fittings before attaching hoses to ease future removal
Safe Handling Techniques
Always use appropriate PPE like gloves and goggles when working with hoses under pressure or when using tools and chemicals. Avoid working in confined or unstable environments where accidents are more likely to occur.
Conclusion
Removing a rubber hose from a barbed fitting doesn’t have to be a stressful or damaging process. With the right preparation, tools, and methods—manual twisting, heat application, tool leverage, or controlled cutting—you can safely and effectively get the job done. Remember to inspect both hose and fitting conditions before starting, and always prioritize safety throughout the procedure.
By following the steps outlined in this guide, DIYers and professionals alike can approach hose removal with confidence. When in doubt, or if the fitting shows signs of serious damage, consult a specialist or consider replacing the component entirely. Your equipment—and your safety—are worth the extra attention.
FAQs
1. Can I reuse the rubber hose after removing it from a barbed fitting?
Yes, you can reuse a rubber hose if it remains intact during removal and shows no signs of cracking, brittleness, or deformation. However, always inspect the inner diameter and end surface to ensure it will still form a tight seal when reinstalled.
2. Is it safe to use a heat gun on rubber hoses for removal?
Yes, using a heat gun or hair dryer is safe if handled correctly. Keep the temperature between 120°F and 150°F and avoid prolonged exposure to prevent melting or weakening the hose. Do not use open flames as they can damage the hose and pose fire risks.
3. What’s the best lubricant to use for loosening a stuck hose?
Silicone spray or water-based lubricants are ideal, as they are rubber-safe and won’t degrade the hose material. Avoid petroleum-based lubricants unless the hose is being discarded, as they can cause rubber to deteriorate over time.
4. How do I know if my barbed fitting is damaged and needs replacement?
Inspect the fitting for visible rust, cracks, bent barbs, or smooth surfaces where the barbs should grip. If any of these signs are present, the fitting may not create a reliable seal and should be replaced to prevent leaks or system failure.
5. Are there universal hose removal tools that work for all fittings?
Yes, hose removal tools and pick sets are designed to work with most common sizes of barbed fittings. However, ensure the tool is appropriately sized for your hose diameter to prevent tearing the hose or damaging the fitting.


