Control valves are vital components in industrial processes. They regulate the flow, pressure, and temperature of fluids and gases, ensuring precise operation of critical systems. However, when these valves encounter problems, it can lead to reduced system efficiency, unplanned downtime, and costly repairs.
In this guide, we’ll take a closer look at the most common control valve problems, their causes, and detailed troubleshooting solutions to keep your processes running smoothly. Let’s dig in!
1. Common Control Valve Problems and Their Symptoms
The first step in troubleshooting is identifying the issue. Control valves can fail in different ways, and each problem has distinct symptoms. Here are the most common problems and what they look like:
1.1 Leaks
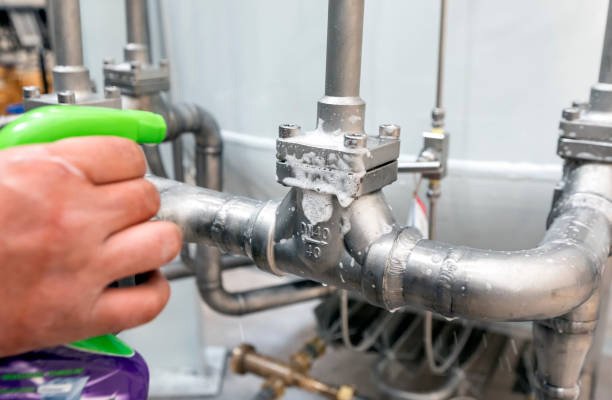
Leaks are one of the most common issues with control valves. They can occur either internally (inside the valve) or externally (at the connections or seals).
- Symptoms of External Leaks:
- Visible fluid or gas escaping from the valve’s body or connections.
- Fluctuations in process pressure.
- Corrosion or damage around the valve area due to exposure to escaping fluids.
- Symptoms of Internal Leaks:
- The valve fails to completely shut off flow, even when fully closed.
- Pressure downstream of the valve increases unexpectedly.
- Increased energy costs due to system inefficiency.
- Causes:
- Worn-out seals, gaskets, or packing.
- Misalignment between the valve seat and plug.
- Corrosion or erosion of internal components.
- Over-tightening of packing material, leading to damage.
1.2 Sticking or Sluggish Valve Movement
A control valve that sticks or moves sluggishly can disrupt process control, causing delays and inaccuracies in system performance.
- Symptoms:
- The valve doesn’t fully open or close as expected.
- Erratic or jerky movements when actuated.
- Slow response times to control signals.
- Causes:
- Accumulated dirt, debris, or residue inside the valve.
- Corrosion on the valve stem, guides, or bushings.
- Inadequate lubrication of moving parts.
- Misaligned or improperly installed actuators.
1.3 Calibration Errors
When calibration issues arise, the valve may not perform as required, leading to incorrect system outputs.
- Symptoms:
- The valve’s position doesn’t match the control signal.
- Inconsistent flow or pressure control.
- Unreliable readings from positioners or actuators.
- Causes:
- Faulty actuators or positioners that lose alignment over time.
- Incorrect installation of control equipment.
- Programming errors in digital control systems.
1.4 Excessive Noise or Vibrations
While some noise is expected during valve operation, excessive noise or vibrations can indicate deeper issues.
- Symptoms:
- Loud hammering, hissing, or buzzing sounds during operation.
- Vibrations that propagate to nearby piping and equipment.
- Damage to the valve or piping caused by prolonged vibration.
- Causes:
- Cavitation, which occurs when vapor bubbles collapse inside the valve.
- High flow velocities exceeding the valve’s design limits.
- Improper valve sizing or selection for the application.
1.5 Actuator Problems
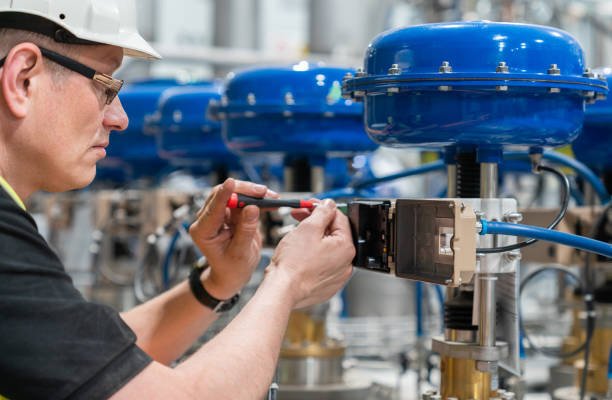
The actuator is responsible for moving the valve. If it fails, the valve won’t operate properly.
- Symptoms:
- The valve remains stationary, even when control signals are sent.
- Weak or irregular movement of the valve.
- Excessive air consumption in pneumatic actuators.
- Causes:
- Leaks in pneumatic systems supplying air to the actuator.
- Electrical malfunctions in motorized actuators.
- Misaligned actuator components or mounting issues.
2. Troubleshooting Common Control Valve Problems
Now that you know what can go wrong, let’s talk about how to fix it. Here’s a detailed step-by-step troubleshooting guide for each issue:
2.1 Troubleshooting Leaks
- Step 1: Inspect the Packing and Seals:
Examine the packing gland for signs of wear, over-tightening, or misalignment. Replace packing material if it’s deteriorated.- Use appropriate packing types for specific applications (e.g., Teflon for high temperatures).
- Step 2: Assess Valve Seat and Plug:
Remove the valve from service and inspect the seat and plug for damage. Replace components if scoring, cracks, or deformation are present. - Step 3: Tighten Connections:
Loose bolts and flanges can cause external leaks. Ensure all connections are properly tightened, but don’t overtighten, as this can cause damage. - Step 4: Address Valve Body Damage:
If the valve body itself is leaking due to corrosion or cracks, you may need to repair it using welding techniques or replace the valve entirely.
2.2 Resolving Sticking or Sluggish Movement
- Step 1: Clean the Valve Interior:
Remove the valve and flush out any debris, dirt, or residue that could obstruct movement. Use a mild solvent to dissolve stubborn deposits. - Step 2: Lubricate Moving Parts:
Apply a high-quality lubricant to the valve stem, bushings, and guides. Ensure the lubricant is compatible with the process fluid to avoid contamination. - Step 3: Inspect for Corrosion:
Check the valve stem and guides for rust or pitting. Light corrosion can be removed with sandpaper, but heavily corroded parts may need replacement. - Step 4: Align the Actuator:
Misaligned actuators can cause uneven force on the valve, leading to sticking. Reinstall the actuator and ensure it’s properly aligned with the valve.
2.3 Fixing Calibration Errors
- Step 1: Recalibrate the Positioner:
Follow the manufacturer’s guidelines to recalibrate the positioner. Use a calibration tool to set the correct zero and span points. - Step 2: Inspect Actuator Linkage:
Ensure the linkage between the actuator and valve is secure and free of play. Adjust it if necessary. - Step 3: Update Control System Software:
Check for software updates or patches that address known bugs in your control system. Ensure compatibility between hardware and software.
2.4 Eliminating Noise and Vibrations
- Step 1: Address Cavitation:
Install anti-cavitation trims to reduce the collapse of vapor bubbles inside the valve. This also protects the valve from wear. - Step 2: Reduce Flow Velocity:
Add flow restrictors or adjust system parameters to lower the speed of the fluid or gas. - Step 3: Verify Valve Sizing:
Check that the valve is appropriately sized for the application. Replace it with a correctly sized valve if necessary.
2.5 Fixing Actuator Problems
- Step 1: Check Pneumatic Air Supply:
Inspect air lines for leaks and ensure the pressure meets the actuator’s requirements. Clean or replace air filters to prevent clogging. - Step 2: Test Electrical Components:
For motorized actuators, test the wiring, motor, and control board for faults. Replace any defective parts. - Step 3: Verify Mounting Alignment:
Ensure the actuator is securely mounted and aligned with the valve stem. Misalignment can cause uneven force and eventual failure.
3. Preventive Maintenance Checklist
Regular maintenance can prevent most control valve issues. Follow this checklist to keep your valves in top condition:
- Inspect seals, gaskets, and packing every 6-12 months.
- Clean the valve interior and moving parts during scheduled shutdowns.
- Lubricate stems, guides, and other components periodically.
- Perform system calibration checks at least once a year.
- Monitor operating conditions for pressure surges, cavitation, or temperature extremes.
Conclusion
Troubleshooting control valve problems involves identifying symptoms, diagnosing causes, and applying effective fixes. With regular maintenance and proper care, you can extend the life of your control valves and keep your processes running efficiently.
Have a control valve issue you can’t figure out? Drop a comment below or consult a professional for personalized advice!
FAQs
Q1. How do I know when to replace a control valve?
Replace a control valve when repair costs exceed 50% of the valve’s replacement cost, or if the valve’s body has sustained severe damage.
Q2. Can I repair an actuator myself?
Yes, simple repairs like replacing seals or cleaning components can often be done in-house. For more complex issues, consult a specialist.
Q3. What tools are needed for valve maintenance?
Basic tools include wrenches, calibration devices, lubricants, and cleaning supplies. Advanced diagnostics may require pressure gauges and software tools.
Q4. What is the lifespan of a control valve?
The lifespan of a control valve can vary depending on factors like the valve’s material, operating conditions, and maintenance. Typically, control valves last between 10 to 20 years. However, proper maintenance can extend this lifespan, while poor conditions and neglect can significantly shorten it.
Q5. How can I prevent cavitation in control valves?
Cavitation can be prevented by selecting the appropriate valve size, reducing flow velocities, or installing anti-cavitation trim. Additionally, you should avoid extreme pressure drops across the valve and make sure the fluid entering the valve is free from particulate matter that could cause erosion.
Q6. How do I know if my control valve is undersized or oversized?
An undersized valve can cause excessive pressure drops, instability in control, or increased noise and vibration. An oversized valve may not provide sufficient control or may result in excessive wear. To determine the proper size, perform a flow calculation based on the process requirements (flow rate, pressure, temperature) and consult with a valve manufacturer or engineering professional.

